
No Rest for the Wicked Guide | How to Complete Sacrament
Here's a guide on how to complete Sacrament in No Rest for the Wicked.
Game Guide by Mash Rahman on Jun 09, 2026
No Rest for the Wicked introduces players to a dark, brutal isometric action role-playing experience where every step forward must be earned through meticulous combat and strategic survival. The foundational narrative journey truly begins with the primary story quest that tasks your character with reaching the fortified sanctuary city known as Sacrament. This massive undertaking tests your fundamental understanding of environmental navigation, item scavenging, and precise stamina management from the very moment you wash ashore.
.jpg)
Completing this expansive questline serves as your official baptism by fire within the punishing world of the island of Sacra. You will transform from a completely defenseless, shipwrecked survivor wearing literal rags into a capable warrior ready to push back against a horrifying plague. This comprehensive walkthrough guide details every major encounter, environmental puzzle, and tactical strategy required to safely reach the gates of the kingdom's last bastion.
Waking Up Stranded in The Shallows
Your grueling journey officially commences in a coastal area known as The Shallows immediately following the catastrophic destruction of Captain Talvic's ship. You wake up on a desolate beachfront surrounded by burning wreckage with absolutely no weapons, armor, or protective gear in your inventory. To officially initiate the main quest, you must carefully walk along the sandy shore to locate the dying captain slouched against a stone structure.
Speaking with the captain provides you with your primary marching orders to head deep into the northeastern territory to seek out the city. Before rushing ahead blindly into the dangerous cliffs, you should spend a significant amount of time thoroughly combing the immediate shoreline for randomized resources. Smashing any wooden barrels, crates, and debris scattered across the sand can yield vital starting materials and food ingredients that will keep you alive.
You will quickly encounter native wildlife such as hostile Horseshoe Crabs wandering the tide pools along the water's edge. Engaging these creatures allows you to practice the game's strict directional combat and dodge mechanics without facing lethal consequences. Defeating them provides valuable raw parts that can eventually be utilized to cook basic restorative meals at a fire pit.
The environment itself contains hidden pathways and vertical ledges that reward players who thoroughly explore the geography. You can safely swim out into the open sea to reach isolated portions of the shipwreck containing small, randomized treasure chests. However, you must continuously monitor your blue stamina gauge while in the deep water because completely exhausting it will cause your character to drown instantly.
As you move further along the northern boundary of the beach, look for a large wooden barricade covering a hidden cave outcropping. Striking this breakable wall with your weapons or bare fists will shatter the boards to reveal a secret treasure chest containing starting gear. You may also locate a dropped tool like a woodcutter's axe, which allows you to harvest lumber from trees once you find proper resources.
Navigating Through Mariner's Keep
After exhausting the resources along the beach, you must follow the ascending rocky stairs to enter the imposing stone ruins of Mariner's Keep. This indoor labyrinthine structure represents a massive step up in environmental verticality and tactical danger compared to the open shoreline. Inside the first major stone chamber, you will discover your very first Whisper, which functions as the game's vital respawn checkpoint and saving terminal.
Activating this glowing blue anomaly ensures that you will not lose significant progression if you fall to the blade of an enemy ahead. From this central checkpoint room, look for a series of wooden ladders that allow you to ascend the inner rims of the watchtower. Carefully walking across narrow wooden planks on the upper levels will lead you directly to glowing item orbs containing random weapons or armor.
You must execute well-timed running jumps to cross broken gaps in the stone masonry to reach heavily guarded chests. Many of these tight walkways are monitored by aggressive rogue soldiers who utilize rapid sword combinations and tracking lunges to throw you off the edge. Due to the exceptionally narrow combat spaces, you must rely on precise parries or directional rolls to avoid being cornered.
Rescuing Filmore and Opening the Way
Descending deeper into the lower courtyards of the keep will bring you face-to-face with a group of heavily armed bandits terrorizing an isolated traveler. These three opponents are incredibly dangerous if fought simultaneously, meaning you should never rush directly into the center of the fray. The most effective strategy involves slowly creeping forward to draw the aggressive attention of a single enemy, allowing you to eliminate them one by one.
Once the immediate area is completely cleared of threats, approach the cowering merchant who identifies himself as Filmore the blacksmith. Grateful for your timely intervention, Filmore will reward your heroism by handing over a vital quest item known as the Gate Lever Handle. This handle is the absolute key to progressing further, as it operates the massive mechanism blocking the northern exit of the keep.
Before leaving the area, you can utilize the glowing furnace located directly to the blacksmith's right as a functional fire pit to craft items. This provides an excellent opportunity to combine your gathered mushrooms and crab meat into nourishing soups that restore your health points. Filmore can also repair any damaged equipment you have managed to scavenge from the nearby chests in exchange for a small fee.
Directly north of the blacksmith's crafting table, you will locate a complex mechanical elevator that features a separate manual lever system. Interacting with this lever a single time will raise the wooden platform to help you transition into the next primary region of the map. However, hitting the lever a second time will lower the platform into a hidden subterranean vault containing premium resources and rare gear.
Journeying Through the Orban Glades
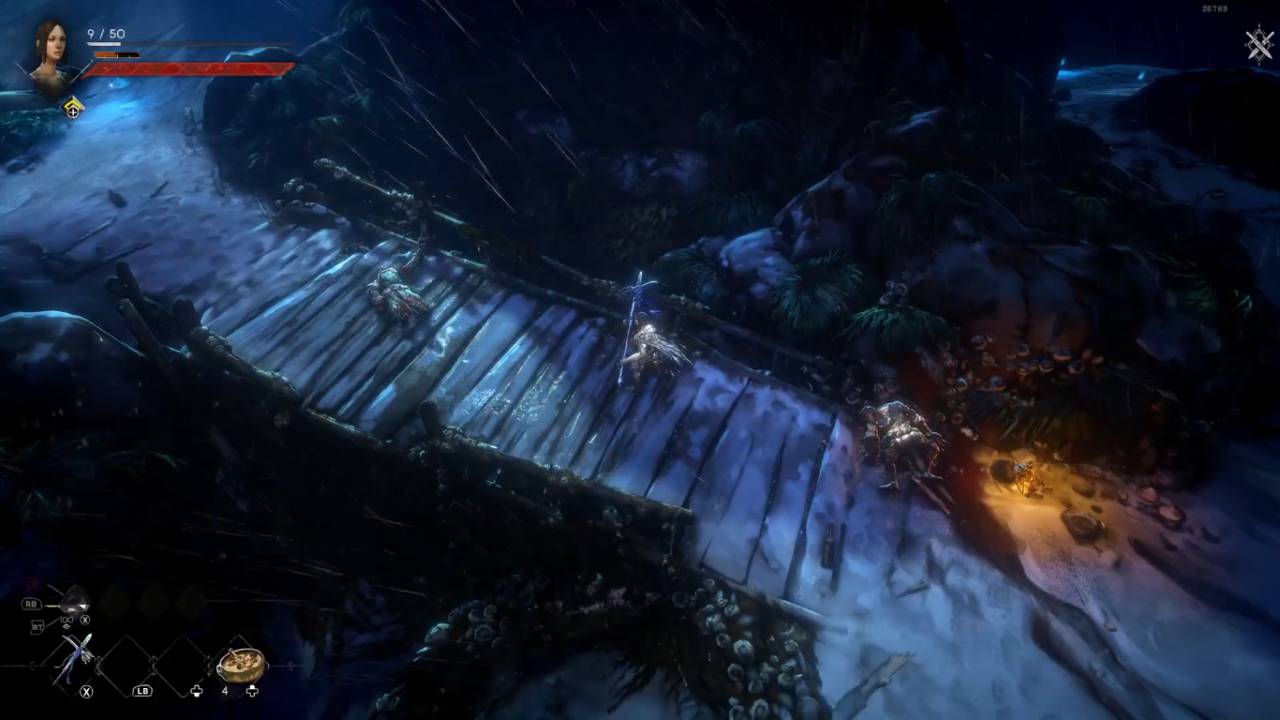
Riding the mechanical elevator upward allows you to exit the dark confines of the keep and step into the lush, overgrown territory of the Orban Glades. This outdoor zone features a sprawling network of interconnected dirt pathways, steep hillsides, and hidden rope bridges. As you navigate the primary path heading east, you will eventually discover a small campsite where two weary hunters are resting.
Speaking with these travelers, named Lara and Reed, provides a sobering warning about a mutated abomination blocking the final mountain pass. They inform you that the creature was once a man but has been entirely corrupted by the devastating magical plague sweeping the island. Use their nearby fire pit to complete your final combat preparations, ensuring your hotbars are fully stocked with healing items.
From the campsite, you must follow the path directly eastward by climbing up thick green vines and crossing a dilapidated wooden bridge. This elevated zone is heavily patrolled by elite variants of corrupted humans known as the Risen, who possess enhanced tracking and higher health pools. It is highly advantageous to lure these enemies backward onto stable, wider ground rather than fighting them on the narrow bridges.
You will also encounter projectile-throwing enemies called Niths who will attempt to rain deadly explosive fire down upon your position from high perches. You should utilize your weapon's unique rune skills, which consume your accumulated focus meter, to quickly burst down these ranged threats. Thoroughly clear out the surrounding watchtowers to secure additional chests before stepping into the final foggy clearing.
Conquering Warrick the Torn
Stepping into the massive, blood-soaked clearing at the end of the mountain pass triggers your very first true boss fight against Warrick the Torn. This towering, mutated monstrosity wields a gargantuan greatsword and attacks with absolute, relentless ferocity from the moment the encounter begins. This battle serves as an absolute check on your mechanical patience and will heavily punish any player who attempts to play over-aggressively.
Warrick utilizes wide, sweeping horizontal slashes and devastating overhead ground slams that can easily deplete your entire health bar in two hits. The absolute golden rule of this encounter is to master your stamina consumption by avoiding the temptation to execute long weapon combinations. You must remain at a mid-range distance, watching his heavy animations carefully and executing precise dodge rolls behind his back as he swings.
When Warrick finishes a massive combination, he will momentarily stagger himself under the immense weight of his own greatsword. This brief recovery animation is your primary window to strike, allowing you to land one or two quick hits before immediately backing away. Being greedy during these short openings will inevitably leave you with zero stamina, rendering you unable to dodge his subsequent counter-attacks.
As his total health pool drops below specific thresholds, Warrick will become noticeably more aggressive and chain faster running lunges together. You must maintain your discipline, utilizing your saved focus meter to unleash your weapon's most powerful runic arts to stagger him. It may take several consecutive attempts to fully memorize his distinct attack patterns and successfully bring the titan down.
.jpg)
Defeating this corrupted champion grants you access to the city and rewards you with your very first legendary weapon, the Corpse-Smeared Blade. This exceptionally powerful sword features unique attribute modifiers and high base damage that will carry you through the next major narrative arc. Take a brief moment to celebrate your hard-earned victory and gather all the rare materials dropped onto the arena floor.
Entering the Gate and the Rookery
With the mutated sentinel finally destroyed, follow the clearing northward to approach the monumental wooden gates of the city of Sacrament. As you draw near, you will be immediately intercepted by heavily armored inquisition soldiers who demand that you state your official business. After a tense verbal confrontation, they will recognize your status as a legendary Cerim warrior and grant you full access to the settlement.
Upon stepping through the threshold, you will discover that the legendary capital city is currently in a state of absolute ruin and economic despair. Your final task to officially close out the Sacrament quest is to navigate through the town square and ascend to the highest point of the settlement. Follow the stone stairs upward until you reach the elevated sanctuary known to the local citizens as the Rookery.
Inside this high tower, you will meet the enigmatic figure known as the Watcher, who will formally welcome you to your new base of operations. Speaking with this individual triggers a major narrative cinematic and successfully completes the foundational questline, unlocking the game's deep town-building mechanics. From this point forward, you can begin gathering raw materials to systematically rebuild the city's ruined shops and restore prosperity to the realm.
Also, check our No Rest for the Wicked Review and other guides below:
Editor, NoobFeed
Latest Articles
No Data.