

ZERO PARADE Guide | How to Handle Dr.Gonza's Paranoia and Retrieve Marco's Tooth
Here’s a detailed guide on how to handle Dr. Gonza's paranoia and retrieve Marco's tooth in ZERO PARADISE: For Dead Spies.
Game Guide by Imdeadfrfr on Jun 26, 2026
To survive the psychological friction, an operative must look beyond the grand ideological battles to address the intimate, fractured realities of Portofiro's citizens. As Agent Cascade, your mission to rebuild your shattered intelligence cell often puts you in touch with those who have been utterly broken by the regime and the global banking cartels.
One of the most intense early-game narrative loops has you navigating the chaos of Party Alley's medical landscape to snatch up an essential operational remedy. The assignment is focused on dealing with Dr. Gonza’s extreme mental breakdown, which is a big mechanical gauntlet for your social attributes.
You can’t just go in there with a hammer and a hard-nosed interrogation routine and not have a catastrophic operational failure.” To navigate this dense social labyrinth, one must master human behavioral assessment, tactical diplomacy, and the preparation of material assets with strict precision.
If you don’t handle the emotional baseline of this encounter well, you will lose valuable underworld connections in the region for good. This clinical theatre is a chilling reminder that in this espionage campaign, information and psychological leverage are far more lethal than physical weapons. This comprehensive operational manual outlines precise narrative routes for exploiting the doctor’s paranoia and safely recovering a vital network asset.
Starting the Quest Mechanics
You begin to engage formally with this subversion loop through your broader investigative tracking of a mysterious regional contact colloquially known as Pseudopod. As you traverse the rain-drenched commercial zones surrounding Quisach Roundabout, you learn that this key informant has succumbed to a terminal, weaponized neural disorder called LASS. You are compelled to find an underground medical solution to keep them alive and operationally loyal to your network.
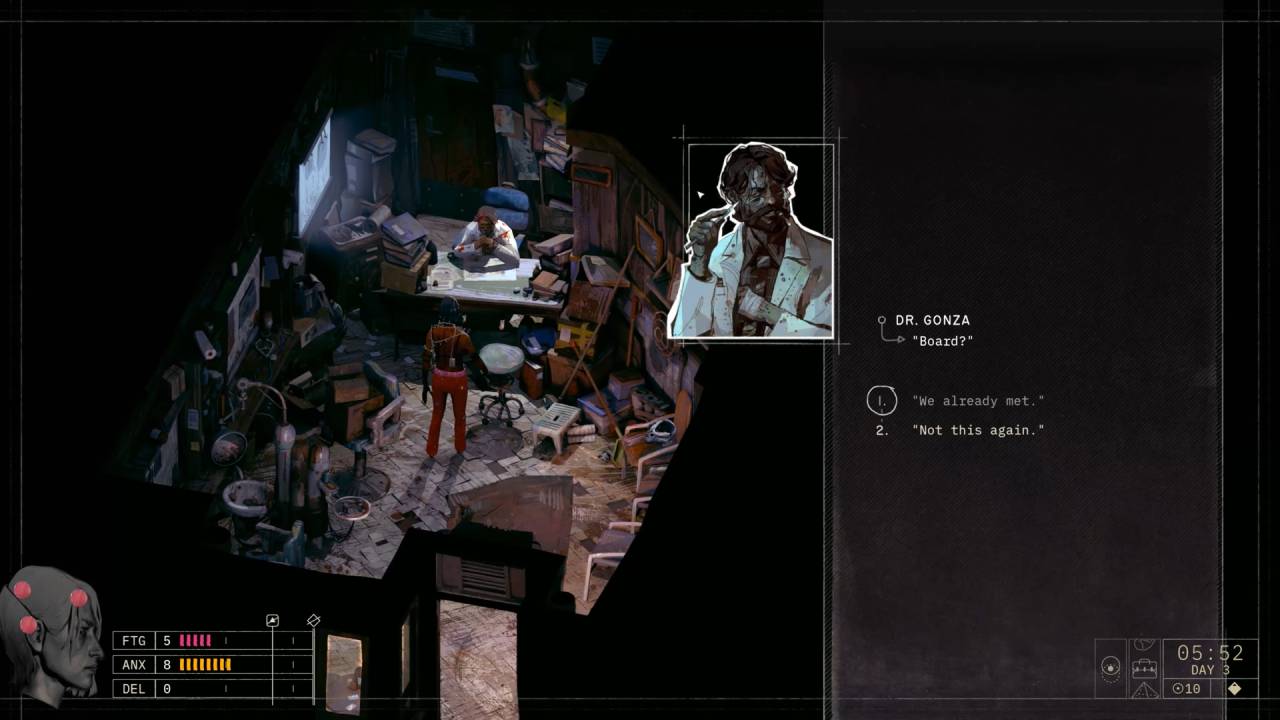
Your vast intelligence files take you straight to a private clinic tucked away in the neon-lit halls of Party Alley. Criminal syndicates watch this section of the city very closely, so you will need to plan your operational schedule very carefully to avoid bringing the government patrols down on you. We strongly suggest that before you cross the threshold of the medical office, you go over your central deduction chalkboard back at the studio.
By interacting with your safe house chalkboard, Hershel Wilk can properly cross-reference known pharmaceutical supply lines across the city-state. This short analytical phase makes sure you know how the black-market narcotics trade really is, under the ministry's very nose. Your background data has been synthesized to such an extent that it has made you structurally prepared for the unpredictable clinical environment that awaits in the alleyways.
Dr. Gonza’s Deep Crisis
One of the most jarring and intense conversational confrontations in the early campaign occurs when entering the blood-splattered rooms of the clinic. Instead of a composed medical professional, Dr. Gonza is covered in physical injuries and is actively trying to kill himself by hanging. The psychological horror is in the air right from the start, and your character needs to employ their best relationship skills to diffuse the immediate suicide attempt.
The doctor is in a deep drug-induced paranoia and is absolutely convinced that the regional medical board and the secret police are about to close in and liquidate him. He will scream frantic accusations about some mysterious person named Marco, who is standing right outside his office door. Gonza is fanatically convinced that Marco is a deep-cover spy, sent in by his corporate rivals to steal his private research files.
To successfully reduce the doctor’s immediate panicked defensiveness, you need to avoid any threatening physical actions or clinical dismissals in the dialogue trees altogether. Every time your operative spews out a chaotic counterargument or an aggressive demand, it immediately racks up big points straight into your active Anxiety tracking meter. You have to listen to his raving and agree to take care of the alleged espionage threat waiting for you outside in the alley.
Getting the Right Hardware
Dr. Gonza's dialogue path will change slightly, revealing a desperate material demand and an acceptance of the grim parameters of the task. He demands you extract one of Marco’s teeth as tangible physical evidence that the alleged undercover network agent has been completely neutralized. The doctor will be handing you a heavy metal prybar frantically to help your cell in this gruesome physical interrogation.
Instead of sprinting down and engaging the target, systematically take advantage of the structural environment right around the clinic layout. Climb the metallic ladder to the right of where Marco is standing to get to the rain-slicked rooftop structures above the alley. While exploring this isolated high-ground area, you can also find a hidden cache containing a rare consumable pack of Sturdy Pony.
.jpg)
You will also notice an industrial air conditioner on the roof that is completely inaccessible without mechanical assistance from a heavy breaching tool. With your new prybar, you can break open the rusted ventilation chassis and salvage valuable black-market goods. Taking the time to perform this thorough physical sweep provides an essential material buffer before you initiate the volatile human confrontation below.
Confronting Marco in the Lane
Climb back down the rusty ladders to start the important conversation sequence with Marco, who appears blissfully unaware of the chaos going on inside the clinic. You have to treat this interaction clinically and analytically to properly determine whether the target is a real threat or just a civilian bystander. You open the conversation by staring him in the eye and confronting him with the doctor's horrible accusations about the medical board espionage ring.
You have to opt to show the metal prybar directly to the target to indicate your tactical seriousness and establish an immediate conversational hierarchy. Marco will be very cooperative when he sees the tool and hears about Gonza's advanced psychological decay. He'll want to save his own life. He will begrudgingly offer to give up one of his own teeth to help you meet the insane demands of the paranoid doctor.
But just because you have a verbal agreement does not mean that the one-of-a-kind item is automatically yours in your active inventory. The system will turn into a stiff, high-stakes mechanical check that forces you to think carefully about your active attribute distribution. To successfully resolve this tense street standoff, you have to call on either pure physical coordination or advanced psychological reading skills.
The Critical Attribute Checks
To obtain the specific item that resembles Marco’s teenage teeth, you must succeed at a flat Coordination check with a required difficulty of eleven. Agent Cascade is able to pass this particular manual test in such a way that the physical trophy can be removed cleanly and safely without causing any catastrophic bodily harm to the target. If your physical attributes are suboptimal, you can instead try a highly specialized Cold Read check, with a difficulty threshold of thirteen.
If your character makes a successful psychological Cold Read check, then they can get into the heart of Marco’s true baseline motivations and reveal hidden truths about his background. This analytical victory provides vital context for the local shipping networks and minor bureaucratic factions operating within the Quisach sector. If you don't pass these checks, you'll have operational problems immediately, and your stress levels will skyrocket, no matter which mechanical path you take.
Fumble the active dice rolls, and the target will panic and bolt into the dark backways, locking you out of a peaceful resolution forever. Your field positioning suffers, and you are hit with an immediate five-point penalty on your internal Anxiety meter for this unforced operational failure. Employing your probability modifiers during this crucial interactive window remains the barebones foundation for successful early-game progression.
Soothing the Bloodied Doctor
You have to march right back into the bloodied clinical office, with the adolescent teeth safely locked away in your active field inventory. The instant display of the grim physical trophy to Dr. Gonza results in a dramatic, immediate shift in his volatile psychological baseline profile. Seeing the tooth completely shatters his current wave of intense paranoia, and he steps down from the ledge to sit behind his desk.
Once the doctor is stabilized and slumped in his administrative chair, you have full clearance to handle the terminal situation plaguing Pseudopod. Go to your inventory and hand over the unique Ultra Violeta data disk to the physician for immediate clinical analysis. Gonza will take a close look at the corrupted files and explain that the informant is in the advanced stages of weaponized LASS.
He will then pass you the highly restrictive anti-LASS medical treatment package required to successfully advance the core regional narrative arc. And calming the doctor also officially adds to your active journal log and unlocks deeper secondary investigation branches throughout the neighborhood. And now you can question him freely about his secret past work with other rogue scientists in hiding in the coastal backways.
Environmental Factors and Wardrobe Optimization
Clever double agents know that physical appearance is literally a mechanical modifier in these high-stakes, nerve-wracking clinical standoffs. Before you even enter Gonza's clinic, you should go to your safe house wardrobe trunk to optimize your character's active clothing gear. Specialized Professional Apparel: The tailored charcoal blend coat and analytical communication headsets provide an invaluable passive boost to your Composure and Intellect.
The bonuses to the materials are an important statistical buffer that naturally reduces the active difficulty of both the Coordination and Cold Read checks. This intentional setup can significantly reduce your structural reliance on highly volatile, stress-inducing dice rolls when dealing with the doctor’s intense paranoia.
You will always need to approach your clothing selection as a functional extension of your psychological toolkit to real operational expertise.
If you foolishly try to move around this blood-soaked clinical theater in low-tier civilian gear, the system will actively punish you for your lack of professional focus. The thematic horror of the hanging sequence is so intense that it will easily overwhelm your baseline mental defenses, causing your internal trackers to trend toward critical breakdown.
So, what is the ultimate rule for surviving the psychological friction of Portofiro? Prepare properly within your home photography studio sanctuary.
Coping with the Stress Economy After Extraction
This intense street-level interrogation leaves Hershel's fundamental psychological architecture deeply broken and teetering on the cusp of cognitive collapse. The enormous accumulation of Fatigue, Anxiety and Delirium sustained through the back-to-back showdowns must be addressed immediately before moving on to assist Pseudopod. If your active Anxiety tracker goes above the critical fifteen-point mark, you will immediately enter the crippling Pressured status.
The Pressured status disables your ability to use critical probability modifiers and leaves your entire mission survival up to the mercy of raw chance. You must immediately cease your active urban exploration loops and withdraw to your hidden loft in order to avoid permanent attribute loss. You’ll be able to methodically bring all three of your main pressure gauges back to absolute zero during an extended period of domestic downtime, while resting in your secure cot.
This necessary pause in the narrative action gives your character room to process the heavy moral and physical compromises of her recent field victory. When your mind is clear, you can go confidently into the southern backways to give your waiting contact the anti-LASS medicine. Dr. Gonza's successful manipulation proves that a brilliant operant can take even the deepest human madness and make it a potent weapon of absolute structural dominance.
Check out our ZERO PARADES: For Dead Spies Review and our other guides:
- ZERO PARADES Guide | How to Recruit all the members for your Endgame Squad
- ZERO PARADES Guide | How to Infiltrate Bagman's Hideout and Get Red Disc
- ZERO PARADES Guide | How to Interrogate Fredrik to Find the Disappearance of Silhouette
- ZERO PARADES Guide | How to Build an Improvised Firearm at the Foto 24 Workbench
- ZERO PARADES Guide | How to Infiltrate the Bootleg Bazaar and Investigate Carmuna
- ZERO PARADES Guide | How to Treat Pseudopod's LASS Condition
- ZERO PARADES Guide | How to Complete Make a Deal with Transnational Capital
- ZERO PARADES Guide | How to Master the Exertion Mechanic and Sway Crucial Dice Rolls
- ZERO PARADES Guide | How to Solve the Opening Cipher Puzzle and Decode the Dossier
- ZERO PARADES Guide | How to Complete Pump and Dump the Junior Negotiator
- ZERO PARADES Guide | How to Locate the Man with No Heart
- ZERO PARADES Guide | How to Navigate the Struggle Between the Superbloc, EMTERR, and La Luz
- ZERO PARADES Guide | How to Outsmart Tesoro Buendia
- ZERO PARADES Guide | How to Successfully Vouch for PSEUDOPOD
- ZERO PARADES Guide | How to Complete the Portofiro Infiltration Main Storyline
- ZERO PARADES Guide | How to Untangle the Cover-Up by Dante and Facundo
- ZERO PARADES Guide | How to Rebuild Your Whole Sick Crew
- ZERO PARADES Guide | How to Use the Conditioning System to Reshape Hershel's Psychological Abilities
- ZERO PARADES Guide | How to Survive Your First Assignment After Leaving the Freezer
- ZERO PARADES Guide | How to Manage Pressure Gauges
Editor, NoobFeed
Latest Articles
No Data.