
Tales of Arise Guide | Basic Combat Mechanics
Here's a guide on basic combat mechanics for Tales of Arise
Game Guide by Mash Rahman on May 31, 2026
Stepping into the twin worlds of Dahna and Rena requires more than just a sharp blade and a strong will. The combat system in Tales of Arise is incredibly deep, fast-paced, and highly rewarding for players who take the time to understand its intricate layers. If you find yourself struggling against the heavily armored Zeugles or the oppressive Renan lords during the opening hours of the campaign, you are absolutely not alone.
The game deliberately throws you into the deep end, forcing you to move away from mindless button mashing and toward a more tactical, calculated approach to every single encounter.
.jpg)
Mastering the foundational mechanics early on is the definitive key to surviving the later dungeons. The combat engine relies heavily on a delicate balance between managing your attack resources, perfectly timing your evasive maneuvers, and utilizing your entire party's unique skill sets in perfect harmony.
By taking a step back and truly analyzing how the battlefield operates, you can transform what initially feels like a chaotic scramble into a beautifully orchestrated dance of destruction. This guide will break down the essential combat knowledge every beginner needs to conquer the early game and set themselves up for absolute victory.
Understanding the Core Flow of Battle
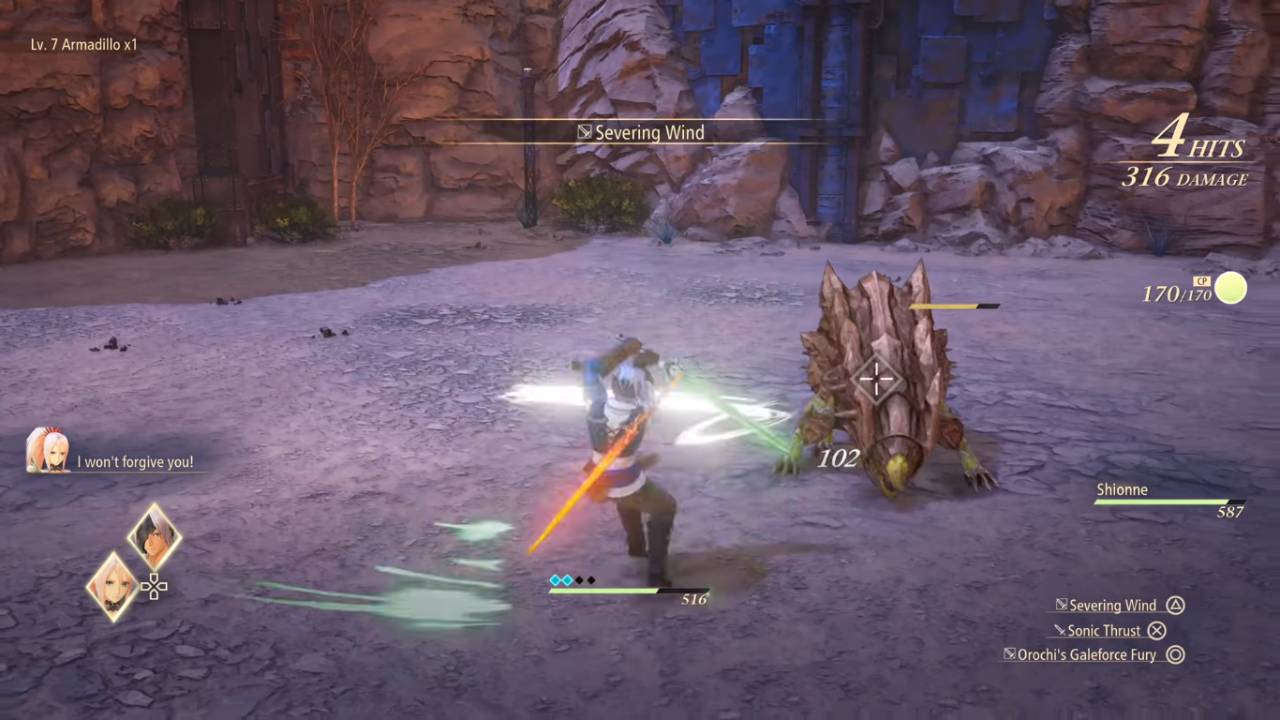
At the very center of your offensive capabilities is the Artes Gauge, commonly referred to as the AG. Unlike traditional mana systems found in other role-playing games, your AG represents your physical stamina and your immediate capacity to string together special attacks. You will start the game with a relatively small gauge, which dictates exactly how many Artes you can unleash in rapid succession.
When your AG is entirely depleted, your character will be temporarily unable to perform their strongest moves, forcing you to fall back on your standard normal attacks while the gauge naturally replenishes over time.
Normal attacks might seem incredibly weak in comparison to your flashy Artes, but they serve a vital, irreplaceable purpose in the combat loop. Stringing together standard attacks allows you to keep the enemy engaged and staggered while your AG silently refills in the background.
The ideal flow of basic combat involves opening with a flurry of normal sword strikes or gun blasts, seamlessly transitioning into your assigned Artes as the gauge permits, and then immediately returning to normal attacks to buy time for the gauge to recover. Understanding this rhythmic ebb and flow is the first major step toward maintaining continuous, unbreakable combo chains against your adversaries.
Mastering Evasion and the Counter Edge
While dealing massive damage is incredibly satisfying, your defensive capabilities are arguably much more important, especially during grueling boss encounters. Tales of Arise completely removes the traditional block button for the majority of the cast, replacing it with a highly responsive dodge roll mechanism.
Dodging an incoming attack at the absolute last possible second triggers a Perfect Evade. This split-second maneuver envelops your character in a bright white aura, completely negating all incoming damage and briefly slowing down time around you.
Successfully executing a Perfect Evade is heavily rewarded through the Counter Edge system. If you immediately press the attack button after a perfect dodge, your character will instantly warp toward the attacking enemy and deliver a devastating counter-strike.
This specific attack has an incredibly high chance of a critical hit and heavily staggers the opponent, completely interrupting their offensive momentum. Learning to actively watch enemy animations and aggressively dodge into their attacks, rather than frantically rolling away from them, will drastically increase your survivability and your overall damage output.
The Power of Boost Attacks
As you actively participate in a battle, you will notice the portraits of your party members slowly filling up with a bright blue light. This signifies their Boost Gauge, a secondary resource completely separate from their standard Artes Gauge. When a character's portrait is fully illuminated, you can press the corresponding directional button to summon them into the fray for a highly specialized Boost Attack.
These attacks are completely free to use and serve as your primary method for dealing with specific, highly annoying enemy archetypes that populate the battlefield.
.jpg)
Every single character in your party possesses a unique Boost Attack designed to hard-counter a specific threat. For example, Shionne can instantly shoot down highly evasive flying enemies, grounding them and leaving them vulnerable to melee combos. Rinwell can completely steal and interrupt the magical incantations of enemy spellcasters, while Kisara can use her massive shield to halt charging beasts dead in their tracks.
Utilizing the correct Boost Attack against the correct enemy type will instantly trigger a Core Break, completely paralyzing the target for a generous window of time and allowing your party to unleash their strongest attacks without fear of retaliation.
Extending Combos and Boost Strikes
Beyond their utility in countering specific threats, Boost Attacks serve a secondary, incredibly powerful purpose as combo extenders. When your active character completely runs out of AG and is locked in the recovery animation of their final attack, you can instantly call in an ally for a Boost Attack.
This immediate intervention keeps the enemy staggered in the air or on the ground, while simultaneously rewarding your active character with a generous chunk of refilled AG. This allows you to immediately resume your own offensive onslaught, artificially doubling or even tripling the length of your combo strings.
Consistently pummeling an enemy with long, unbroken combo chains is the strict requirement for triggering a Boost Strike. As you deal damage and rack up hits, a blue crosshair diamond will slowly fill up directly over the enemy's body. Once this gauge is completely full, the word Strike will aggressively flash across the screen.
Pressing the corresponding directional pad prompt initiates an unstoppable, cinematic team-up attack that instantly executes normal enemies, regardless of their remaining health points. Dealing massive damage to bosses relies entirely on chaining together long combos to trigger these devastating Boost Strikes as frequently as possible.
Navigating the Cure Points System
While your offensive Artes are governed by the rapidly regenerating AG, your defensive and supportive magical abilities operate on a completely different economy known as Cure Points, or CP. Your CP pool is shared across the entire party and dictates exactly how many times Shionne or Dohalim can cast their vital healing spells, resurrect fallen allies, or apply defensive buffs.
Unlike the AG, your CP does not regenerate naturally during combat. It is a strictly finite resource that demands highly careful management, especially during long, grueling dungeon crawls where safe zones are scarce.
If you completely exhaust your CP pool during a massive boss fight, your party will be entirely incapable of healing themselves through magical means. The only way to restore CP while actively engaged in combat is by consuming highly expensive Orange Gels from your inventory.
Because these restorative items are incredibly costly in the early game, you must learn to play defensively and rely heavily on your perfect evasion skills to avoid taking unnecessary damage. Outside of combat, your CP can only be fully restored by resting at a local inn or setting up a campfire in the wilderness.
Capitalizing on the Over Limit State
As the tide of battle ebbs and flows, your characters will naturally absorb damage from enemy attacks and successfully execute perfect evasions. Accumulating enough of these specific actions will eventually push a character into the highly coveted Over Limit state. When this occurs, the character will be enveloped in a blazing blue aura, and their traditional Artes Gauge will completely transform into a solid, unbreakable line.
This visual shift indicates that all of their standard Artes and magical spells are now completely free to cast for a limited time, entirely removing the standard AG restrictions.
Entering the Over Limit state transforms your character into an unstoppable force of nature. Furthermore, their standard attack animations cannot be interrupted by normal enemy strikes, allowing you to aggressively push the offensive line without fear of being staggered. However, the absolute greatest benefit of the Over Limit state is the ability to unleash a Mystic Arte.
By holding down two specific face buttons during a combo while the blue aura is active, your character will perform their ultimate, cinematic finishing move. These devastating attacks deal monumental damage and should be strategically saved for when a boss enemy is heavily staggered or broken.
Tactical AI Management and Strategy
While you directly control the actions of a single character, your remaining three party members are governed entirely by the game's artificial intelligence. Leaving their behavior on the default settings is a recipe for absolute disaster, as they will aggressively burn through your precious CP pool to heal minor scratches or mindlessly cast elemental spells that the enemy is naturally resistant to. To prevent this frustrating behavior, you must actively dive into the game's Strategy menu and heavily customize their tactical decision-making process.
You can set highly specific parameters for your AI companions, commanding them to strictly preserve your CP pool until a character falls below a critical health threshold. You can also command them to completely disengage from the enemy and focus entirely on evasive maneuvers when they are severely wounded, keeping them alive while you handle the immediate threat.
Furthermore, you can manually disable specific Artes in their individual menus, preventing Rinwell from casting water magic against a water-elemental boss. Taking the time to properly program your AI companions will drastically reduce your frustration and ensure they act as a highly competent, supportive fighting force.
Preparation and Pre-Battle Rituals
Success in Tales of Arise is often determined long before you even draw your weapon on the battlefield. Preparing your party through external systems is just as vital as mastering your perfect dodges. Whenever you discover a campsite, you must make a habit of cooking a hearty meal for the party.
These culinary dishes provide incredibly potent, time-limited buffs that can increase your physical attack power, drastically boost your defense against specific elements, or accelerate the rate at which you earn combat points and experience.
Furthermore, you must completely abandon the habit of selling your outdated weaponry for quick cash. The crafting system in this game frequently requires you to use older, weaker swords and rifles as the foundational base materials for forging the absolute strongest endgame equipment. Instead of selling weapons, focus on hunting down specific elemental accessories.
Equipping a simple accessory that reduces incoming fire or light damage by half will completely trivialize the devastating, screen-clearing attacks used by the major realm lords. By combining smart preparation, tactical AI management, and a deep mastery of the core evasion mechanics, you will easily conquer every single early-game challenge the twin worlds have to offer.
Check out our Tales of ARISE - Beyond the Dawn Edition Review and other guides:
- Tales of Arise Guide | All Recipe Locations
- Tales of Arise Guide | All Fishing Spots and Fish Locations
- Tales of Arise Guide | All the Locations of the Artifacts
- Tales of Arise Guide | All Astral Flower Locations
- Tales of Arise Guide | Unlock the Big Game Hunter Trophy
- Tales of Arise Guide | Unlock the Wall Smasher Trophy
- Tales of Arise Guide | Unlock the Raging Current Trophy
- Tales of Arise Guide | Unlock the Night Blossom Trophy
- Tales of Arise Guide | Unlock the Veteran Rancher Trophy
- Tales of Arise Guide | Get the Diligent Counterattacker Trophy
- Tales of Arise Guide | Unlock Putting the Past in Its Place Trophy
- Tales of Arise Guide | Conquering the Ultimate Group Training
- Tales of Arise Guide | Ultimate Level 100 XP Farming Strategy
- Tales of Arise Guide | All Dahnan Owl Locations
- Tales of Arise Beginner's Guide | Gameplay Tips & Tricks
Contributor, NoobFeed
Latest Articles
No Data.