
Fellowship Guide | Best Helena Tank Build & Rotation
Master Helena with a clean tank rotation, strong pulls, and the right stat focus to dominate dungeons and early access content.
Game Guide by Faviyan Mustafiz on Oct 19, 2025
Helena is a sword-and-shield tank who plays like a blend of protection archetypes, offering straightforward threat control, heavy mitigation, and reliable crowd management. If you have ever tanked in similar MMOs, you will feel immediately at home.
This guide explains how to keep your defense resource high, how to open and sustain packs, and how to build for consistent cooldown cycling and survivability so you can charge in, control the battlefield, and let your team decimate encounters.
Role Overview: The Shielded Vanguard
You are the standard tank, operating around a defense resource—often referred to as a barricade or toughness bar—that reduces incoming damage and boosts block chance.
Your gameplay centers on charging into packs, generating this defensive bar, rotating your high-impact abilities on cooldown, and maintaining threat with a mix of single-target and cleave attacks.
The kit feels approachable and rewarding: get in, build mitigation, and keep enemies glued to you while cycling cooldowns for constant control.
Core Mechanic: Keeping The Defense Bar High
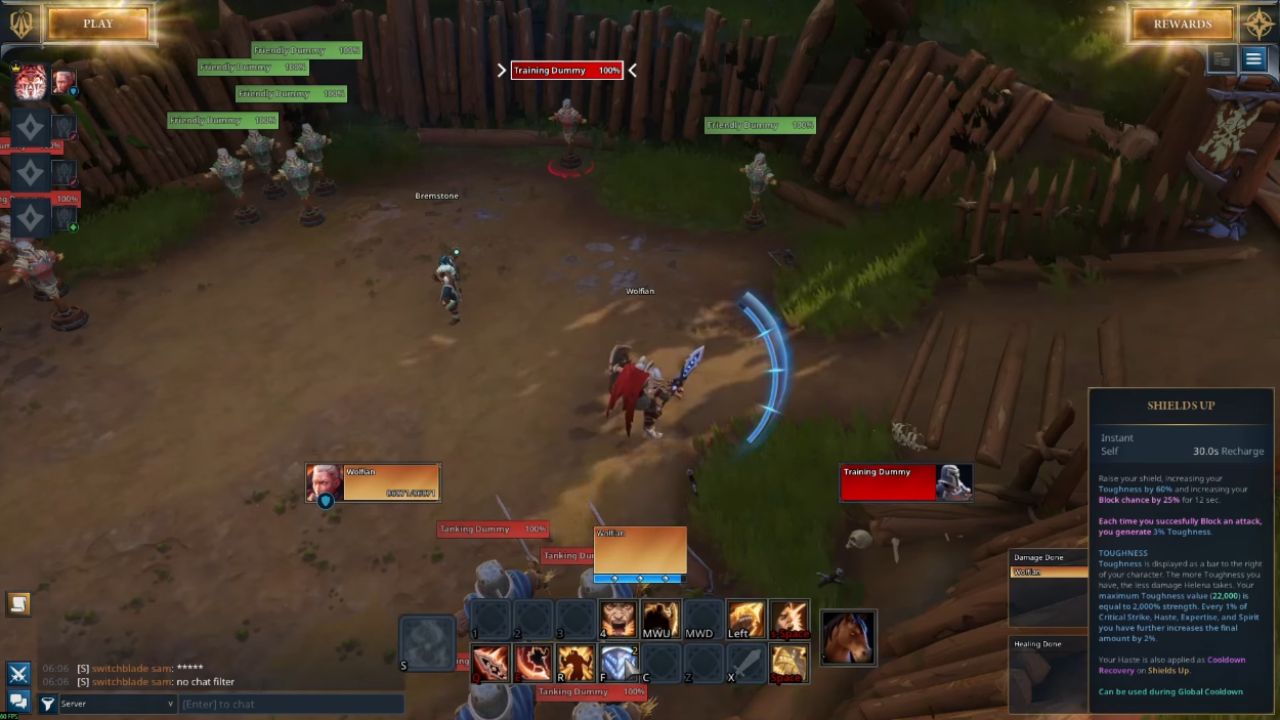
Your mitigation hinges on maintaining your defense bar at a high level. Use Shields Up to immediately generate shielding and raise your effective damage reduction. Follow with Shield Block when incoming pressure spikes.
The higher this bar, the less damage you take; it also improves your block chance. Shield Slam contributes to resource generation and scales with certain unlocks tied to this bar, so pressing it often is both offensive and defensive value.
Pulling And Engagements
Open by using Charge or Shield Throw to initiate and gather packs. Shield Throw bounces and helps pull additional targets into your range. Once engaged, build your defense bar with Shields Up, Shield Block, and Shield Slam.
When stragglers peel off, snap them back with Taunt; configuring mouse-over targeting can help you grab runners without losing focus on the primary clump.
After the first wave collapses on you, keep expanding the pull radius by throwing your shield to nearby groups, then re-center them for efficient cleave.
Rotation: Single-Target And Cleave
Your rotation is cooldown-driven and designed to keep threat while accelerating your own cooldowns. On entry, use Shield Slam to establish AoE threat, then alternate between Power Strike for single-target pressure and Measured Strike for cleave on the pack around you.
Shield Slam and Measured Strike hit multiple enemies, while Power Strike focuses one target. Rotate these buttons as they become available to keep constant pressure and to trigger your cooldown-reduction synergies.
Cooldown Synergy And Ability Interactions
Ability interplay is central to your flow. Shield Slam reduces the cooldown of Shockwave, while Power Strike shaves time off Shield Slam and Shield Throw. Because each press accelerates the next, you should cycle through abilities as soon as they are ready to keep the engine running.
Prioritize Shield Slam on cooldown to maintain AoE threat and to feed cooldowns into your larger control tools. This creates a smooth loop: slam for threat, strike to hasten the next slam and throw, then repeat.
Shockwave: Your Big AoE Control
Shockwave is a heavy AoE that also slows enemies, letting you stabilize pulls and reassert top threat. Use it after everything groups up on you: charge in, pop Shield Slam for instant cleave and resource, then detonate Shockwave to cement control before returning to Shield Slam and your strikes. The slow adds safety during wide pulls, giving you time to reposition, re-shield, or kick key casts.
Defensive Management And Threat Security

You can hold threat reliably even against high team damage by pairing mitigation with frequent cleave. Maintain the defense bar with Shields Up, Shield Block, and repeated Shield Slam usage.
Kick dangerous casts whenever possible and Taunt any enemies attempting to escape. In large chains of pulls, open with Charge, follow with Shield Slam, pop Shield Block if pressure spikes, then use Shockwave to lock packs in place before continuing the rotation loop. Keep the defense bar up at all times; if it drops, refresh immediately to prevent damage spikes.
Ultimate And Passive: Siege Breaker & Veteran Of War
Your ultimate, Siege Breaker, supercharges cooldown flow and survivability. While Siege Breaker is active, damage taken is reduced, and Shield Slam, Shield Throw, and Shockwave deal increased damage.
Crucially, Siege Breaker doubles the cooldown-reduction effect granted by Veteran Of War, your passive that trims timers as you use core abilities. The result is a burst window where your kit loops even faster, keeping you tanky while amplifying AoE control and damage.
Stat Priorities And Build Path
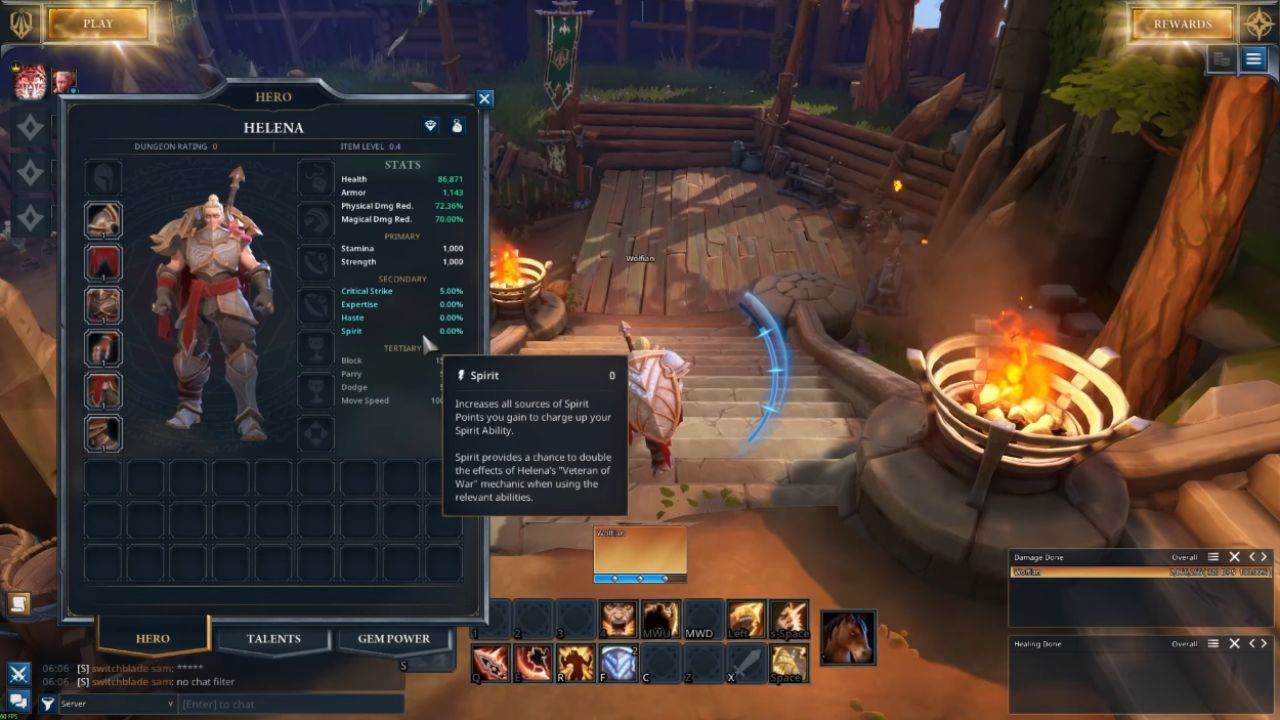
Focusing on Spirit is highly effective because it sustains Siege Breaker uptime and enhances the chance to double-proc Veteran Of War effects, accelerating cooldowns across your rotation.
When Spirit triggers extra reductions on Shield Slam and Shockwave, your major tools return rapidly, enabling aggressive multi-pack pulls with mitigation always on tap.
Alternatively, investing in Expertise offers increased flat damage and boosts to healing and absorb effects you trigger. If your shield’s protection counts as an absorb, Expertise becomes especially valuable; otherwise, the Spirit route remains the premier choice for fluid, safe, and fast gameplay.
Practical Pull Pattern
A reliable pattern is to Charge into the priority target, immediately Shield Slam to set AoE threat, use Shield Block or Shields Up to stabilize your defense bar, then Shield Throw to tag adjacent packs so they collapse onto you.
As the group stacks, drop Shockwave to secure the clump, then keep rotating Shield Slam, Measured Strike, and Power Strike as they come off cooldown.
Maintain Taunt for any runner and keep an interrupt ready to shut down dangerous casts. This rhythm keeps your defense bar high, your threat secure, and your cooldowns cycling for constant control.
Playstyle Summary
You control the pace by pulling confidently, fortifying your defense resource, and rotating cooldowns without hesitation. Press core abilities on cooldown to feed Veteran Of War, layer Shockwave for burst control, and unleash Siege Breaker for high-tempo windows where mitigation and AoE damage spike.
With this approach, you comfortably manage large pulls, maintain top threat, and deliver the classic, satisfying shield-tank experience that makes Helena shine in Fellowship.
Also, check our Fellowship Review other guides below:
- Fellowship Beginner’s Guide | Gameplay Tips & Tricks
- Fellowship Guide | Best Ardeos Build & Rotation
- Fellowship Guide | Best Mara Build & Rotation
- Fellowship Guide | Best Sylvie Healer Build & Rotation
- Fellowship Guide | Best Meiko Tank Build & Rotation (Early Game)
- Fellowship Guide | Best Rime Build & Rotation (Quick Start)
- Fellowship Guide | Best Vigour Healer Build & Rotation (Quick Start)
- Fellowship Guide | How to Pick the Right Class
Contributor, NoobFeed
Latest Articles
No Data.