
Diablo IV: Lord of Hatred Guide | How to Beat Abhorrent Manifestation Boss
Here's a guide on how to beat abhorrent manifestation in diablo 4
Game Guide by Mash Rahman on May 29, 2026
As players leave the familiar, snow-bitten terrains of Fractured Peaks and step into the dense, oppressive heat of the Nahantu region, the Vessel of Hatred expansion immediately sets a new tone of pervasive corruption. Your desperate search for Neyrelle, who still carries the agonizing weight of Mephisto's soulstone, brings you to the outskirts of Gea Kul.
The bustling desert city and its surrounding territories are actively being consumed by the Hollows, a terrifying, unnatural phenomenon. This great fleshy rot corrupts the local wildlife and citizens into mindless, warped abominations that further the Lord of Hatred's grand design.
Much of the narrative momentum of the early expansion hinges on making clear just how aggressive this new threat really is. This is not just wandering into some established dungeon and claiming ancient treasure. You are instead actively defending the borders of civilization against a creeping, biological invasion.
It is in this desperate defense that you encounter the Abhorrent Manifestation. This monstrous thing is a local concentration of the spreading evil.
Meeting the creature is a required milestone in your campaign progression. While it may not have the sprawling, multi-phase mechanics of an endgame Uber Boss, the Abhorrent Manifestation is an important thematic introduction to the types of enemies you will face across Nahantu.
You will be tested on your ability to manage spatial awareness, prioritize targets during chaotic swarms, and react to fast-traveling projectiles in an open-world arena environment.
Questline: Rising Enmity
But before you even see the manifestation itself, the Enmity Rising questline has you getting your hands dirty in the trenches of this new conflict. Outside the gates of Gea Kul, you encounter the seasoned mercenary Raheir, and soon learn that things in the Eastern Basin are going from bad to worse.
Raheir accompanies you as a guide and fighting companion during this sequence. He lends a grounded urgency to the mission, fighting with you as the local militia tries to hold the line against the infected wildlife.
Together, your job is to smash the Hollow Defilements scattered across the sunbaked landscape with violence. These pulsing fleshy nodes hold the corruption in place and generate lesser monsters to slow your progress.
Systematically hunting down the first six defilements in the Eastern Basin is a practical combat tutorial. You can get acquainted with the movement patterns of the new hollowed enemies, and also test your current skill rotation with an active NPC companion.
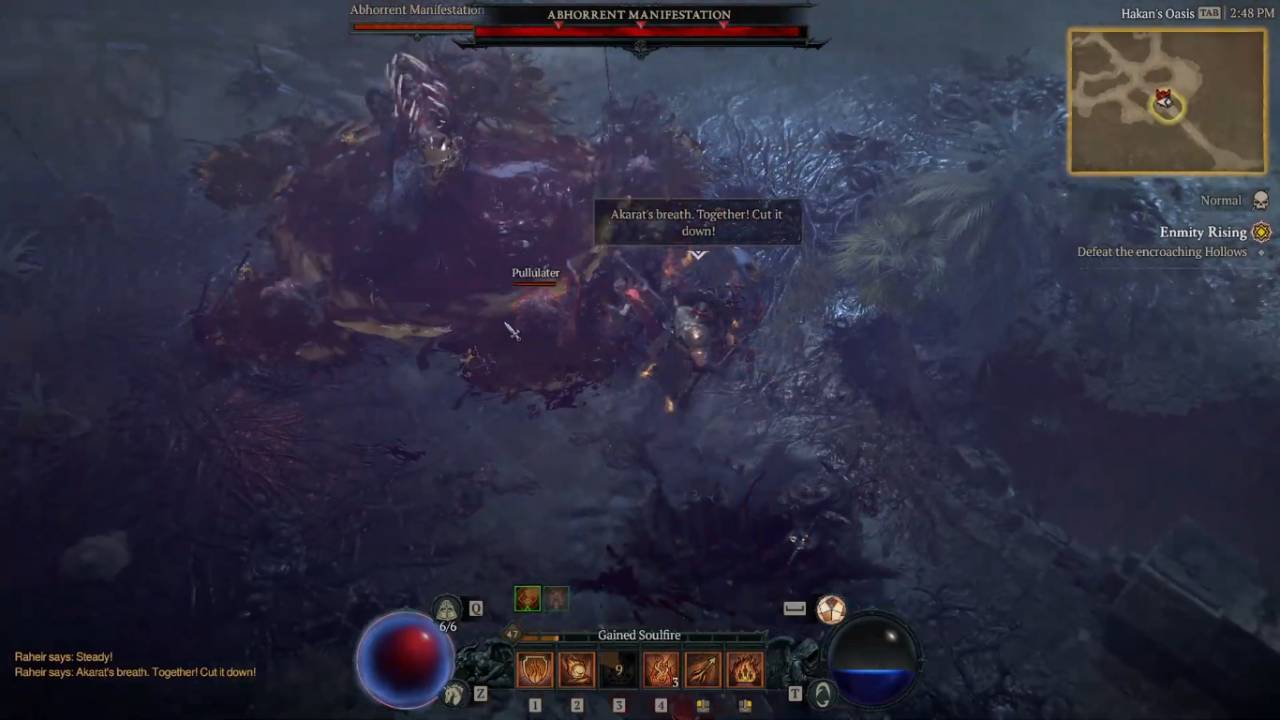
The rot, however, is deeply entrenched in the earth. The further east you go into Hakan’s Oasis, the more corruption there is. The air is thick and heavy, and you must destroy another set of profane defilements to finally track down the source of the outbreak. The slow, atmospheric crescendo reaches its climax at the edge of a ruined structure named the Crumbled Bridge, offering a bleak setting for the ensuing conflict.
Preparing for the Battle at the Broken Bridge
You won’t be able to go back to a major hub city to fully rework your build right before the fight because the Abhorrent Manifestation encounter is part of a seamless, continuous open-world questing sequence. While you are on the hunt for defilements to secure a smooth victory, it is absolutely vital to anticipate the tactical demands of the upcoming battle.
The basic threat profile of the Hollows and the manifestation itself is mostly just numbers and poison and corrosion attacks. If you still have early game gear with not enough elemental resistances, the damage from these toxic abilities will stack up fast, and you will burn through your healing potions.
It is highly recommended that you focus on getting any jewelry or armor that gives a big boost to poison resistance. These little tweaks will make the upcoming battle at Hakan’s Oasis a lot less deadly.
In addition, a single-target build alone will have a hard time maintaining control of the battlefield during this particular quest. With fewer enemies coming with the boss, you’ll need reliable, high-impact area-of-effect abilities.
.jpg)
One of the most important things before you start the final sequence at the Crumbled Bridge is to have at least one wide-sweeping skill or a potent crowd-control ult on cooldown. This simple preparation will give you the breathing room you need to focus on the primary target without being swarmed.
The Coming of the Tailed Horror
When they finally reach the Crumbled Bridge, the entire scale of the infestation becomes clear. A tremendous wave of oncoming Hollows assaults your position and you and Raheir are forced into a desperate defensive position back to back. You’ll need to hold your ground and hack down the corrupted creatures as they spill out of the surrounding terrain.
The first wave of lesser enemies is just beginning to thin when the true source of the defilement rips its way onto the battlefield. The Abhorrent Manifestation is a terrifying visual display, a perfect example of Mephisto’s twisted influence.
It is a huge, asymmetrical mass of mutated flesh, throbbing violently with dark energy. Most strikingly, the creature has no conventional limbs. Instead, it rears its great bulk and lashes out at the world about it with a series of thick, muscular tendrils. Its design is so grotesque that even a glance makes its movements difficult to predict.
The manifestation is surprisingly simple in its combat style, despite its massive size and terrifying appearance. No elaborate magical rites or screen-filling area denial spells required. Instead, it uses its physical bulk to exert control over the immediate vicinity around it. It is a heavy anchor while its summoned minions try to flank and overwhelm you.
Avoiding Acidic Saliva
The boss's main way of dealing with players who try to keep their distance is a very quick and very corrosive ranged attack. The Abhorrent Manifestation will suddenly jerk back its fleshy bulk and violently hurl a large glob of toxic spit towards your current location.
The projectile comes with surprising speed, instantly closing the gap between you and the creature. Should you take a direct hit from the spit, you will take a nasty burst of initial damage. Immediately after that, a lingering poison effect painfully eats away at your health globe.
The arena in the Crumbled Bridge can get very cluttered with summoned enemies and environmental debris, making it very easy to miss subtle telegraphing animations from the boss. The wind-up for this deadly attack can sometimes be hidden by the visual chaos of your own combat skills.
Proactive, lateral footwork required, always sidestepping this toxic barrage. Once you see the central mass of the creature contract and pull back, use your evade charge to sprint sharply to your left or right.
Dodging backward will be punished hard as the projectile’s splash radius can often clip you at the edge of your movement. If you keep a constant, circular strafing pattern around the boss, you can often bait the spit attack into harmlessly striking the empty ground behind your previous position.
Mastering The Hollow Summoning
The real mechanical crux of the Abhorrent Manifestation fight isn't its personal damage output, but its inexorable ability to call for reinforcements. The boss is manipulating the corrupted earth below your feet with its mutated anatomy.
Now and again, the creature will stab one of its immense tendrils violently into the ground. This special visual indicator means that it will start summoning immediately. Five new Minion Hollows will violently burst forth from the dirt around the boss just moments after the tendril breaks the surface.
These single minions are quite weak, but they spawn suddenly and aggressively disrupt your targeting. They are a fleshy barrier, actively trying to body-block your movement and interrupt your carefully planned evasion patterns.
Ignore these summoned creatures and concentrate all your damage on the manifestation, and soon you will find yourself entirely surrounded. You have no control on the battlefield, which makes you completely susceptible to the boss's next barrage of caustic spit.
The best way is to treat the tendril animation as an instant priority change. As soon as the Hollows pull themselves out of the ground, unleash your prepared area-of-effect powers to melt the cluster before they can spread out across the bridge.
Culling these minions quickly keeps your escape options open and provides a steady stream of health potion drops. This unending stream of healing resources allows you to easily out-sustain the boss’s relatively low damage output for the duration of the entire fight.
The Aftermath and the Ambush at Urivar
Systematically work your way through the caustic spit and take out the summoned Hollows. The sustained pressure will eventually take down the Abhorrent Manifestation. Its fleshy form breaks apart violently and melts back into the corrupted earth.
Beating the boss rewards you with a pile of scattered gold and valuable experience to help your progression. The Crumbled Bridge is safe for now - the immediate threat has been successfully removed. Raheir comes closer, and you get a brief reprieve from the heavy atmosphere to consider the aftermath of the battlefield.
But the victory is incredibly short-lived. It is only a theatrical lead-in to one of the most shocking narrative turns in early expansion. You walk to the bridge overlook to follow the trace of the last Hollows, when a sudden, merciless cutscene breaks the brief moment of triumph.
.jpg)
Urivar, fanatical commander of the Burned Knights, strikes your position with terrifying speed and ruthless precision. In a display of utter, merciless cruelty, Urivar cruelly hacks off Raheir's arm. That blindingly fast strike immediately takes out the veteran mercenary who fought so valiantly at your side.
The heavily armored zealot runs you through with his flaming blade before you can even register the sudden violence or properly defend yourself. You are left bleeding out and presumed dead in the dusty ruins of Hakan's Oasis.
This gut-wrenching sequence serves as a brutal final chapter to the Enmity Rising questline, quickly ratcheting up the personal stakes of the Vessel of Hatred story. The meeting with the Abhorrent Manifestation turns out to be a clever distraction. It gives a false sense of security about the dangers of Nahantu only to provide a staggering, unforgettable reminder of the bloody human conflicts tearing Sanctuary apart from the inside out.
Also, check out our Diablo IV Review, Diablo 4: Vessel of Hatred DLC Review, and other guides below:
- Diablo IV: Lord of Hatred Guide | How to Beat Enkindled Judicator Boss
- Diablo IV: Lord of Hatred Guide | How to beat Dread Captain Boss
- Diablo IV: Lord of Hatred Guide | How to Beat Eidolon of Jualin Boss
- Diablo IV: Lord of Hatred Guide | How to Beat Priestess of Hatred Boss
- Diablo IV: Lord of Hatred Guide | How to Get Doom Transmogs
- Diablo IV: Lord of Hatred Guide | How to Unlock Nahantu Tiger Mount
- Diablo IV: Lord of Hatred Guide | How to Get all the Cat mounts and Armors
- Diablo IV: Lord of Hatred Guide | Understanding Gear and Items
- Diablo IV: Mythic Gear Guide | How to Farm Mythic Items
- Diablo IV: Lord of Hatred Guide | How to Beat Uber Lilith
- Diablo IV: Lord of Hatred Guide | How to Beat Tormented Andariel
- Diablo IV: Lord of Hatred Guide | How to Beat Tormented Duriel
- Diablo IV: Lord of Hatred Guide | How to Beat Tormented Beast in the Ice
- Diablo IV: Lord of Hatred Guide | How to Beat Tormented Lord Zir
- Diablo IV: Lord of Hatred Guide | How to Beat Tormented Grigoire
- Diablo IV: Lord of Hatred Guide | How to Beat Tormented Varshan
- Diablo IV: Lord of Hatred Guide | Forging an Unstoppable Champion
- Diablo IV: Lord of Hatred Guide | Paladin Build: Mastering the Zealous Shredder
- Diablo IV: Lord of Hatred Guide | Paladin Build Mastering the Falling Star Arbiter
- Diablo IV: Lord of Hatred Guide | Paladin Build: Mastering the Holy Purifier
- Diablo IV: Lord of Hatred Guide | Warlock Build Mastering the Umbral Chains Weaver
- Diablo IV: Lord of Hatred Guide | The Ultimate Endgame Build
- Diablo IV: Lord of Hatred Guide | Essential Tips and Tricks for Traversing Sanctuary
- Diablo 4 Guide | Warlock Build Mastering the Blood Pact Invoker
- Diablo 4 Guide | Mastering the Pinnacle Challenges of Sanctuary
- Diablo IV: Lord of Hatred Warlock Build Guide | Mastering the Shadow Summoner
- Diablo IV: Lord of Hatred Guide | How to Choose Your Ideal Class
- Diablo IV: Lord of Hatred Guide | Warlock Build Mastering the Brimstone Apocalypse
- Diablo IV: Lord of Hatred Guide | Mastering the Frost Juggernaut
Editor, NoobFeed
Latest Articles
No Data.