
Diablo IV: Lord of Hatred Guide | How to Beat Ah Bulan Boss
Here's a guide on how to beat Ah Bulan in Diablo IV Lord of Hatred
Game Guide by Mash Rahman on May 30, 2026
The great world of Sanctuary continues to explore the spiritual planes with the addition of the Nahantu region and the Vessel of Hatred campaign expansion. Following the grand storyline involving Neyrelle and the residual corruption of Mephisto, players are eventually forced to enter the mysterious Spirit Realm.
It is in this mystical, shifting twilight world that players come face to face with one of the game’s most mechanically demanding and notoriously polarizing story bosses, Ah Bulan, the Mender of Veils.
Ah Bulan was once a revered and noble Spirit Guardian, charged with tending the delicate boundaries between worlds, but he has sadly fallen prey to the spreading infection of hatred.
In the critical main quest line called Across the Threshold, your character finally finds him in the sanctum, but you find a twisted, aggressive version of this ancient protector. This huge menacing leonid centaur does not give you direction, but raises his terrible weapons and turns them against you. You have no alternative but to fight for your life immediately.
You need to defeat this specific boss to progress the core expansion story. It’s not like a normal campaign fight where you can sit there and trade blows, ignoring the big boss animations; Ah Bulan requires pure mechanical discipline. If you don't understand his special phase transitions and random movement patterns, you will instantly die and have to run back repeatedly through the Spirit Realm.
The Infamous Scaling and Difficulty Bump
The Ah Bulan encounter is infamous for its sudden and jarring increase in mechanical difficulty for unsuspecting players. Early acts of the Nahantu storyline, most characters can easily breeze through packs of monsters and minor dungeon guardians without highly optimized builds. However, if you reach the Mender of Veils, you encounter a sudden structural wall that aggressively tests your character’s fundamental defenses and overall damage scaling.
The sudden increase in lethality is a common talking point among active community veterans, as the boss has several raw damage scaling properties that feel wildly overtuned. Players who play the campaign on higher world tiers, such as Expert or Penitent, often complain about being instantly killed by what appears to be normal physical sweeps. That kind of damage output leaves very little room for error, making a casual narrative quest into a tense tactical trial.
We highly recommend taking a temporary step back and auditing the quality of your current equipment before starting the encounter to avoid hitting a complete progression wall. The first and most important baseline step is to fully upgrade your weapons and armor pieces to your current character level. The difference between surviving a heavy hit or being sent back to the checkpoint can be a few crafting materials spent at the blacksmith applying defensive tempers like max life or total armor percent.
Training Your Champion for the Battle of the Astral
To survive the assault within the Astral Sanctum, a mindful blend of mobility, a high sustained heal, and active shield mechanics are needed. Ah Bulan has several primary physical sweeps that apply the debilitating Vulnerable status effect, so your passive damage reduction stats can be quickly compromised. This means that defensive layers such as active barriers, fortify generation, and ironclad armor caps are extremely valuable during the encounter.
If you are playing a character class that naturally has no reliable self-healing or defensive bubbles, you have to rely heavily on active evasion and external support systems. A quick trip back to the local Alchemist to brew up a high-tier elixir to increase your maximum health or armor value offers a much-needed protective buffer. Also, make sure your potion capacity is maxed out to match your current health pool, which is essential for keeping up with his non-stop pressure.
For solo players struggling to hold their own against this vicious centaur, a highly effective strategy is to use the expansion’s dedicated mercenary system. Whether you want the defensive expert Raheir or the utility-oriented Subo, a visit to the secret mercenary hideout to pick up a reliable companion can be a game-changer. Having a solid mercenary companion on hand can take a lot of the boss’s direct aggro, which gives your character the precious breathing room needed to get some high-damage skill rotations off from a relatively safe position.
Decoding the Central Spear & Shield Armory
Ah Bulan walks onto the battlefield. In one hand, there is a huge, stylized spear. In the other hand, there is a heavy, protective shield. A versatile combat style that covers all ranges. His main baseline attack pattern is Rapid Thrusts, a super-fast series of consecutive spear stabs from the front that can quickly chew through a player’s health pool. This specific animation has a very subtle visual cue, so you have to be on your toes at all times when you are right in front of his face.
.jpg)
The absolute golden rule for dealing with these rapid frontal stabs is to always maintain your diagonal mobility and attack the boss only from behind. Whenever you see the centaur preparing to thrust, immediately use your dodge mechanic or a movement skill and slide right past his flanks to reach his rear. This strategy of keeping him at a distance completely negates the danger of his forward-facing weapon sweeps, while allowing you to safely unleash your primary offensive cooldowns into his unprotected back.
In addition to his basic martial weapon attacks, the corrupted guardian will periodically unleash a devastating magical ability called the Spirit Spiral. Ah Bulan will dramatically lean backward to perform this move, then slam his weighty spear into the hard earth, sending a dense wave of ethereal spirit orbs outward in an expanding circular spiral. These spectral projectiles hurt like hell and can easily catch a distracted player mid-rotation, so you'll need to time your movement carefully and weave between the gaps of the expanding orbs.
To round out his baseline arsenal, the boss frequently employs his centaur physiology to conduct highly disruptive leap attacks throughout the entire arena floor. Ah Bulan will suddenly coil his lower body and leap high into the air, disappearing from your immediate view for a moment before crashing down with great force. There’s a large, distinct red telegraphed circle on the floor of where this jump is going to land, allowing you a brief window to quickly sprint or evade away from the impact zone to avoid the resulting area-of-effect shockwave.
Making it through the spooky twin clone stage
The real mechanical challenge of the Mender of Veils encounter really starts to kick into gear once you’ve successfully whittled away about thirty percent of his total health bar. When the boss hits this particular structural milestone, he will pause for a second and summon two complete clones of himself directly onto the playing field through his astral mirror magic. Those duplicates aren't a mirage; they have their own health bar, and they can use his entire baseline toolkit at the same time.
With three massive centaurs now prowling the arena, the level of visual chaos and potential for damage overlap increases exponentially. The clones will be actively coordinating their Rapid Thrusts and Spirit Spirals. So it's a very hostile environment where one misstep can be an instant and untelegraphed one-shot death. This is the chaotic transition period when many players face serious progression blocks as the arena quickly fills with overlapping red danger zones.
In order to successfully break down this first split phase, you need to fully fight the urge to mindlessly attack the main boss or split your focus across all three targets evenly. Instead, you have to assume a very defensive posture immediately, and use all of your single target burst damage to take out one specific clone as fast as humanly possible. The sooner you can get the fight back to a two-on-one, the dramatically lower the incoming damage density will be and the vastly more manageable the rest of the phase will be.
Defeat Intermediate Minion Resurgence
When both first duplicates are successfully crushed, the real Ah Bulan will rejoin the active fray, but his tactical approach shifts to a more swarm-oriented approach. Dissolve his mirror images, and the corrupted spirit guardian will start channeling dark astral energy to open summoning portals that will flood the immediate arena floor with standard corrupted minions. These lesser adds may lack the devastating individual power of the clones, but they can still pose a serious threat if left completely unchecked.
These small minion waves are there to distract you, to block your paths, and to prevent you from getting behind the boss to position yourself cleanly behind his flanks to avoid his Rapid Thrusts. If your character build is largely based on single-target damage, it’s easy to get overwhelmed and pinned down by the sheer volume of surrounding entities. It is important to use your core area-of-effect abilities, crowd control skills or pulling mechanics to clear out the chaff quickly, but keep an eye on the boss’s animations.
On the bright side, this intermediate minion phase is a crucial resource recovery window that you can proactively capitalize on to set yourself up for the final stretch of the encounter. Defeating these smaller enemies is a surefire way to get some valuable potion charges on the ground for you to restock your empty inventory. Also, classes that depend on generating resources or stacking passive offensive buffs with kills can use this brief mob wave to fully charge their high-tier combat systems before the boss triggers his final phase shift.
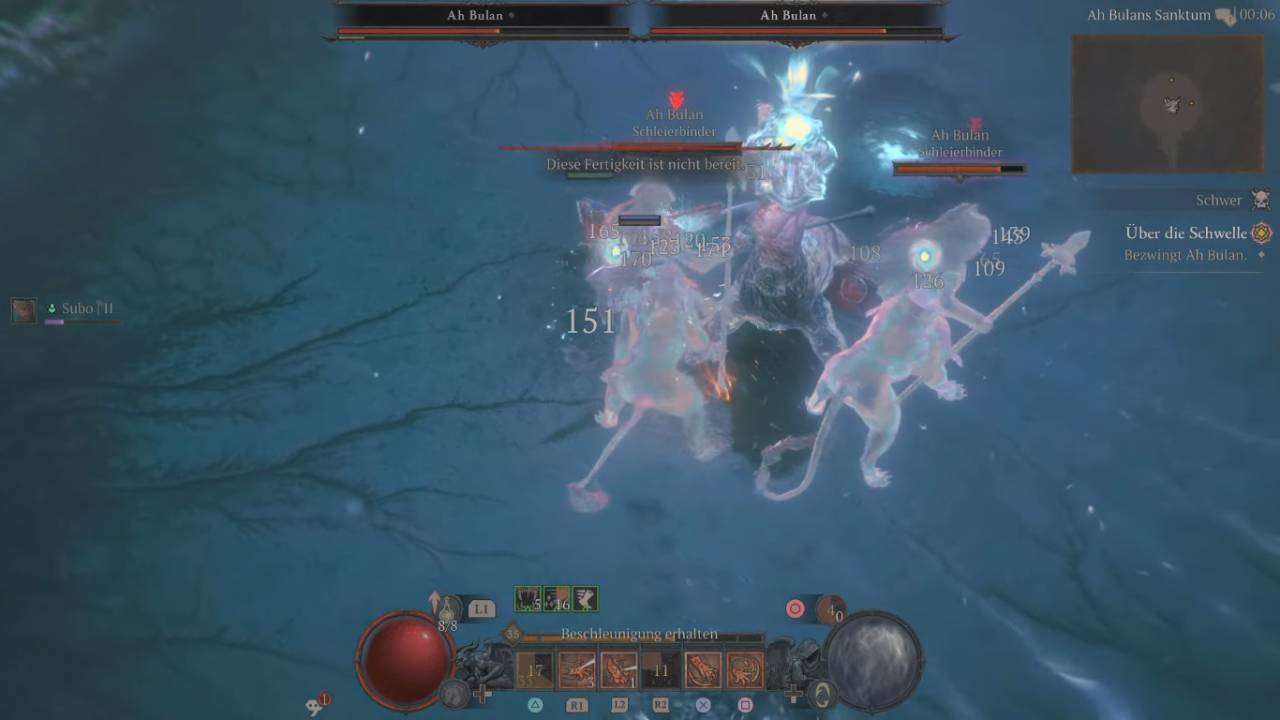
Survive The Madness Of The Last 3 Clones
The last climax of the fight triggers on a clockwork-like basis once you manage to bring Ah Bulan down to about thirty percent of his remaining health pool. Once this final, crucial threshold is met, the desperate spirit guardian will unleash his most powerful chaotic spell, summoning a grand total of three separate clones to fight alongside him at the same time. This final manifestation offers a terrifying four-way offensive that marks the absolute pinnacle of the encounter's mechanical challenge.
The sheer number of entities doing overlapping Spirit Spirals and sudden leap attacks can easily overwhelm both your character’s defenses and your actual computer performance. In this transition, many players have experienced significant network lag or frame drops due to the sheer density of particle effects filling the screen, making precise dodging even more difficult. In these frantic final moments, the odds of taking a totally untelegraphed physical attack from a clone who isn’t directly in your camera view are insane.
To get through this last bit, you need to maintain a constant fluid motion, abandoning any static attack rotations where you need to stay still for longer than a second. Use your active evade charges and mobility skills to run in wide, circular paths around the outer edge of the arena, forcing the four centaurs to clump together into a single manageable pile. Group the targets and blow your ultimate and hardest-hitting area-of-effect bursts to kill the duplicates all at once, while continuously moving your character out of the path of the incoming spears.
.jpg)
Alternative Approaches and Regaining Momentum
If you notice your character keeps dying in the last clone phase even if you have perfect movement, it’s important to understand that the current tuning of the encounter might just be a hard gear check. Some class archetypes, like a fresh Spiritborn or minion-reliant Necromancer, can experience particular mechanical friction points based on how companion AI works or how specific skill interactions behave during the split mechanics. Your summons could bleed off valuable damage potential across a number of invulnerable targets, instead of focusing on one critical clone.
There is absolutely no shame in using the game's built-in difficulty scaling options to get yourself back on track if you hit a completely insurmountable block that brings your progress through the expansion story to a complete halt. Dropping the world difficulty temporarily down to Normal when opening your character menu will drastically reduce Ah Bulan’s bloated health pool and lower his individual attack damage to a reasonable level. This alternate path allows you to comfortably skip the over-tuned mechanics in under a minute without losing any of your hard-earned campaign progress.
When the last clone falls, and the true Mender of Veils is properly put down, the smothering corruption will at last be lifted from his ancient spirit. On successfully completing this fierce battle, your character is rewarded with a large sum of gold, valuable experience points, and a range of high-quality equipment upgrades to help improve your overall power level. More importantly, beating this astral trial permanently clears your path through the rest of the Nahantu storyline, letting you confidently march onward toward your final confrontation with the forces of Hatred.
Also, check out our Diablo IV Review, Diablo 4: Vessel of Hatred DLC Review, and other guides below:
- Diablo IV: Lord of Hatred Guide | How to Beat Urivar Boss
- Diablo IV: Lord of Hatred Guide | How to Beat Vesicator Boss
- Diablo IV: Lord of Hatred Guide | How to Beat Abhorrent Manifestation Boss
- Diablo IV: Lord of Hatred Guide | How to Beat Enkindled Judicator Boss
- Diablo IV: Lord of Hatred Guide | How to beat Dread Captain Boss
- Diablo IV: Lord of Hatred Guide | How to Beat Eidolon of Jualin Boss
- Diablo IV: Lord of Hatred Guide | How to Beat Priestess of Hatred Boss
- Diablo IV: Lord of Hatred Guide | How to Get Doom Transmogs
- Diablo IV: Lord of Hatred Guide | How to Unlock Nahantu Tiger Mount
- Diablo IV: Lord of Hatred Guide | How to Get all the Cat mounts and Armors
- Diablo IV: Lord of Hatred Guide | Understanding Gear and Items
- Diablo IV: Mythic Gear Guide | How to Farm Mythic Items
- Diablo IV: Lord of Hatred Guide | How to Beat Uber Lilith
- Diablo IV: Lord of Hatred Guide | How to Beat Tormented Andariel
- Diablo IV: Lord of Hatred Guide | How to Beat Tormented Duriel
- Diablo IV: Lord of Hatred Guide | How to Beat Tormented Beast in the Ice
- Diablo IV: Lord of Hatred Guide | How to Beat Tormented Lord Zir
- Diablo IV: Lord of Hatred Guide | How to Beat Tormented Grigoire
- Diablo IV: Lord of Hatred Guide | How to Beat Tormented Varshan
- Diablo IV: Lord of Hatred Guide | Forging an Unstoppable Champion
- Diablo IV: Lord of Hatred Guide | Paladin Build: Mastering the Zealous Shredder
- Diablo IV: Lord of Hatred Guide | Paladin Build Mastering the Falling Star Arbiter
- Diablo IV: Lord of Hatred Guide | Paladin Build: Mastering the Holy Purifier
- Diablo IV: Lord of Hatred Guide | Warlock Build Mastering the Umbral Chains Weaver
- Diablo IV: Lord of Hatred Guide | The Ultimate Endgame Build
- Diablo IV: Lord of Hatred Guide | Essential Tips and Tricks for Traversing Sanctuary
- Diablo 4 Guide | Warlock Build Mastering the Blood Pact Invoker
- Diablo 4 Guide | Mastering the Pinnacle Challenges of Sanctuary
- Diablo IV: Lord of Hatred Warlock Build Guide | Mastering the Shadow Summoner
- Diablo IV: Lord of Hatred Guide | How to Choose Your Ideal Class
- Diablo IV: Lord of Hatred Guide | Warlock Build Mastering the Brimstone Apocalypse
- Diablo IV: Lord of Hatred Guide | Mastering the Frost Juggernaut
Editor, NoobFeed
Latest Articles
No Data.