
Diablo IV: Lord of Hatred Guide | How to Beat Eidolon of Jualin Boss
Here's a guide on how to beat Eidolon of Jualin Diablo IV Lord of Hatred
Game Guide by Mash Rahman on May 28, 2026
The thick, uncultivated wilds of the Nahantu region hide countless secrets of generations, far beyond the mortal world and into the mystical borders of the Spirit Realm. As players work through the expansive main story of the Vessel of Hatred expansion, following Neyrelle's complex plight, they will have to navigate a path haunted by old ghosts.
Ultimately, the journey takes adventurers along the historic Pilgrim’s Trail to a remote destination called the Buried Chamber. In this claustrophobic, subterranean sanctum, players will have to contend with a very formidable ethereal entity called the Eidolon of Jualin.
.jpg)
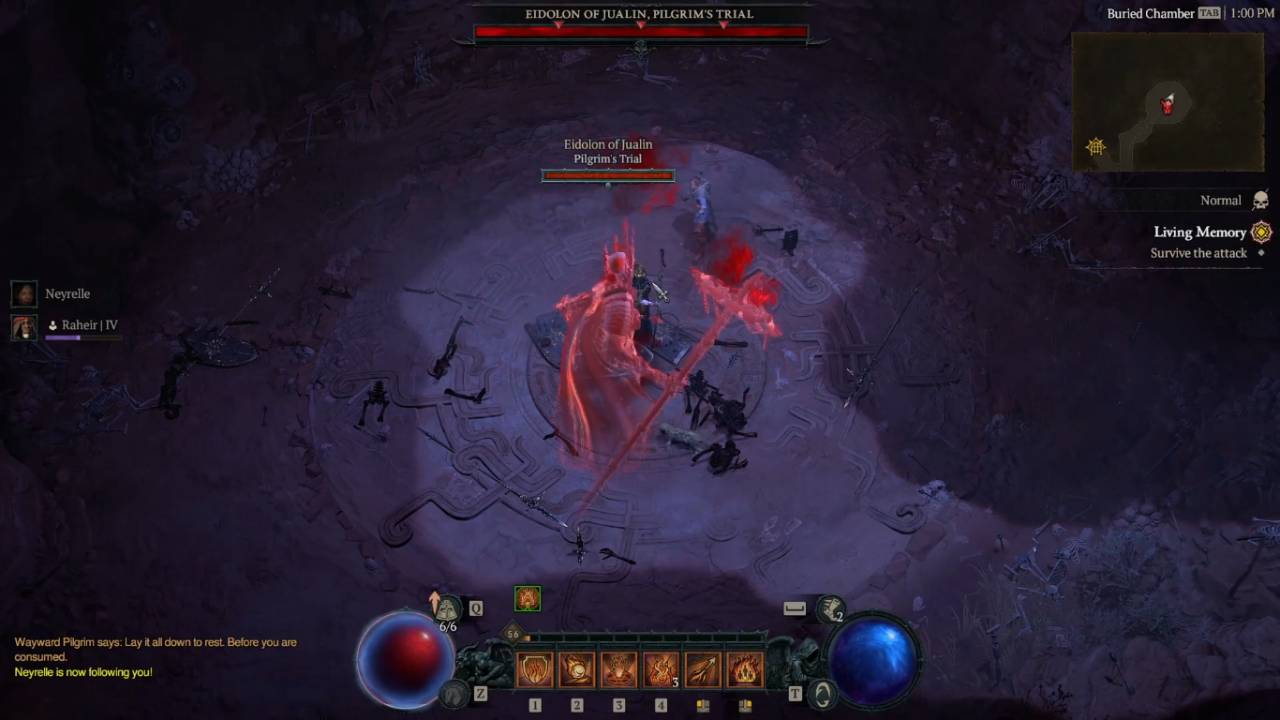
The Spectral Witness of the Buried Chamber
This special encounter occurs during the vital progression steps of the main story quest, Living Memory. Unlike many of the malicious demons and bloodthirsty cultists you routinely slaughter across Sanctuary, the Eidolon does not initially appear as a direct enemy.
Upon entering the dusty depths of the chamber, one encounters this ancient spirit as a calm, friendly apparition connected to the sacred history of the path. But the delicate, placid mood is suddenly shattered after a savage ambush by the zealous forces of the Burned Knights.
As the knights' immediate mortal threat is finally neutralized, the spectral guardian suddenly and violently changes. The Eidolon, in a misbegotten attempt to gauge the chaos or test your worthiness for continued passage along the sacred trail, becomes profoundly aggressive and unleashes his tremendous magical powers against you.
To proceed further in the campaign storyline, you have to defeat this ghostly specter as a requirement. The fight is a very calculated mechanical check that forces players to master spatial management, visibility mechanics, and multi-target switching in a very tight combat zone.
The Sudden Upsurge and Structural Adjustments
Many players can find this fight coming out of nowhere in the early phases of the Nahantu campaign, as they are used to the gradual ramp-up of difficulty. Until this very moment in the story, standard quest progression doesn’t usually require a highly optimized character build or acute situational awareness. The Eidolon of Jualin subverts this safety net by serving as a sudden mechanical filter that punishes greedy, immobile playstyles. The fight is carefully tuned to punish builds that rely on purely static channeling or don't have instant burst AOE.
The enclosed design of the Buried Chamber makes the overall lethality of the boss’s individual abilities much more pronounced, as there is very little natural space to run away. The community often points out that the sheer density of spectral particle effects can make the arena feel incredibly overwhelming for players running slower characters. One wrong move in positioning while he’s going through his brutal elemental casting loops and your character can be easily locked down and killed. This turns what should be a simple campaign milestone into a stressful trial of your fundamental mechanical execution.
And it is very helpful to do a quick, scoping audit of your current gear before you get into the spirit, lest you run into a progression wall, which is aggravating. Ensure your core weapons are fully upgraded to your current character level; this will give you the raw damage output you need to bypass his summon loops efficiently. You can also utilize the blacksmith to temper basic defensive stats such as flat max life or general damage reduction metrics to give you that extra split-second survivability window to recover from a mistimed dodge.
Preparation before Combat and Elemental Resistances
Get your defensive layers in place before you enter the boss’s trigger radius as your first line of defense against a premature defeat. The Eidolon of Jualin relies heavily on high-impact lightning and physical restriction fields to wear down aggressive players. If you don't pay attention to your elemental resistance thresholds before starting this fight, you'll probably end up back at the local checkpoint rather quickly. If you take the time to raise your lightning resistance to the standard seventy percent baseline, this will greatly reduce the lethality of his primary storm spells.
A quick stop at the local Alchemist in town to craft a high-tier Elixir of Lightning Resistance is a great protective buffer for characters having a hard time finding the stat on their gear. Additionally, you should ensure your active healing potions are fully upgraded to your current level tier to ensure your health recovery scales well with incoming damage. If you’re in a crowded battle space, wearing armor pieces or legendary aspects that automatically pop up a defensive barrier when you hit an elite enemy will give you a little extra security.
For players looking to face this encounter on their own, the newly added mercenary system available in the expansion can fundamentally change the power dynamic of the arena. Bringing a beefy tank buddy like Raheir from the mercenary den can take a lot of positional strain out of the fight. A well-built mercenary can draw immediate aggression from the boss and soak up heavy attacks on the front lines, giving your character the freedom to unleash high-damage skill rotations from a safe distance.
How to Handle Tight Bone Walls
The Eidolon begins the combat with a large, ornately carved magical staff that serves as the focus for all of his primary spellcasting loops. He seldom uses this huge weapon as a normal physical attack, but instead focuses dense, ethereal energy to manipulate the structure of the arena floor. One of the most common and most annoying early tactics he will use is to suddenly summon dense Bone Walls directly under or right around your character’s position.
From the dirt, these skeletal structures rise instantly, effectively dividing the already narrow chamber into isolated pockets of danger. A well-timed Bone Wall can leave your character completely flat-footed, trapping him in place and cutting off escape routes, leaving you separated from the boss. This trap effect can be particularly deadly with his active area of effect spells, as you can be easily boxed in with no natural way to run away.
To defeat this spatial confinement, you need to resist the panic reflex and focus on regaining your field mobility immediately. These Bone Walls have their own health pools that can be destroyed and can be physically shattered by direct application of offensive skills. As soon as you notice a barrier in your path of movement, instantly aim the structure with a high damage primary skill or a quick melee string to blow a clean exit path through the bones.
Surviving Black Tornadoes and Visibility Disruption
Alongside this, the Eidolon will also routinely use a very unique visibility hazard that players will know as the Black Tornado mechanic. For this attack, the spectral boss will thrust his staff forward and release a slow-moving black orb that will quickly grow into a whirlpool of shadow energy when it hits the ground. These black tornadoes don’t just float around the room lazily; they hang around the battlefield doggedly for long periods of time, severely limiting your safe areas.
Walking into one of these dark vortexes will cause moderate, continuous shadow damage over time, but the real threat is the immediate environmental blindness it causes your character. When you are within the borders of a Black Tornado, your total screen visibility is reduced to a small, dark circle directly around your character's feet. This massive visual impairment stops you from seeing incoming boss animations, following projectile trajectories, or pinpointing safe zones during the remainder of the chamber.
The absolute golden rule for dealing with these swirling shadow storms is to use an active, keeping-away strategy by deliberately kiting the boss around the outer rim of the chamber. If you see a tornado forming, immediately use your mobility tools to bring the active combat to the far side of the room. By leaving the middle floor clear of these visibility traps, you ensure you have a clear and perfect view of the boss's staff animations, giving you the reaction time needed to dodge his follow-up attacks.
Weathering the Storm of the Tracking Lightning
Once you've found a good rhythm for dealing with his spatial traps, the Eidolon will unleash his most visually spectacular and dangerous elemental spell, the Lightning Storm. The boss raises his massive staff high into the air, his ghostly form crackling with volatile energy, causing dark storm clouds to quickly gather across the ceiling of the Buried Chamber. After a very short delay, many bolts of high-voltage lightning will begin raining down violently in a very concentrated spread pattern.
Now these particular thunderbolts are not the usual lightning hazard in the environment. They are not static, and do not strike randomly. They will actually home in on you, and strike where you are. If you try to stand still to finish casting a long channeling spell, you will eat multiple lightning strikes in a row, easily overwhelming your active barriers and instantly killing your character. Running away in a straight line is also very dangerous because the tracking bolts can easily calculate your trajectory and hit you while you’re running.
To survive the electrical onslaught, you have to employ a fluid, diagonal micro-movement method around the safe zones of the floor. As soon as the dark storm clouds roll overhead, forget stationary offensive rotations and start moving across the floor in a tight, deliberate zig-zag pattern. This quick reversal throws off the tracking system of the converging lightning, and the heavy bolts safely detonate harmlessly in the dirt just behind your character's heels.
Disabling the Phantom Summoning Phase
The structural complexity of the fight changes dramatically once you successfully deplete the Eidolon’s total health bar beyond the halfway mark, triggering his primary transition phase. In his ghost form, the boss will glow a deep, menacing crimson as he slams his staff into the stone floor to begin a Phantom Summoning loop. The spell opens ethereal rifts, immediately calling forth a devoted troop of ghostly reinforcements to fight alongside him, including nimble ghost archers and armored spectral melee fighters.
The sudden appearance of these phantoms throws your tactical priorities out the window, because they will immediately try to surround your character and mess with your movement options. The ghost archers are particularly problematic because they will spread out to the outer edges of the chamber and set up a deadly crossfire of ranged arrows while you are busy dodging the boss's main spells. These reinforcements will add up without supervision, and soon enough the battlefield will be a mess, and it will be nearly impossible to see a clean path to avoid the lightning storms.
To successfully end this stage, you need to immediately switch targets from the main boss to the newly spawned phantoms with your highest damage area-of-effect or crowd control abilities. You’re able to clear the entire ghost squad in one clean rotation with abilities that can group enemies or lock them in place. You destroy these lesser targets and not only regain control of the arena floor, but also guarantee the drop of vital healing potion charges to replenish your reserves for the final stretch.
Execution of the Final Phase and Campaign Advancement
.jpg)
The last stage of the battle is the final convergence of all his individual mechanics, and requires absolute discipline and composure from the player. The Eidolon will begin to chain his Bone Walls, Black Tornadoes, and tracking Lightning Storms into a single, fast overlapping combo. Often you’ll be breaking through a bone barricade to escape a converging lightning strike, while a swirling shadow vortex is actively trying to blind your vision.
And this final frantic stretch of the battle is where your speed and situational awareness are your absolute lifelines. Don't be greedy on your damage output; just concentrate on survival and only chip away at his remaining sliver of health when you are absolutely sure you are standing in a safe zone. Prioritize fast, high-impact abilities that can be safely used while moving, allowing you to keep up consistent damage output without locking your character into a stationary animation.
If your particular character build is still hitting a wall that's too tall to climb in this last phase despite perfect mechanics, remember you always have access to outside scaling tweaks. There’s no shame in hitting pause on your character settings menu and dropping the active world difficulty by a tier to get through an annoying campaign block. This other path allows you to easily avoid the bloated stats, pick up your quest rewards, and continue with Neyrelle on the narrative adventure of the Vessel of Hatred expansion with confidence.
Also, check out our Diablo IV Review, Diablo 4: Vessel of Hatred DLC Review, and other guides below:
- Diablo IV: Lord of Hatred Guide | How to Beat Priestess of Hatred Boss
- Diablo IV: Lord of Hatred Guide | How to Get Doom Transmogs
- Diablo IV: Lord of Hatred Guide | How to Unlock Nahantu Tiger Mount
- Diablo IV: Lord of Hatred Guide | How to Get all the Cat mounts and Armors
- Diablo IV: Lord of Hatred Guide | Understanding Gear and Items
- Diablo IV: Mythic Gear Guide | How to Farm Mythic Items
- Diablo IV: Lord of Hatred Guide | How to Beat Uber Lilith
- Diablo IV: Lord of Hatred Guide | How to Beat Tormented Andariel
- Diablo IV: Lord of Hatred Guide | How to Beat Tormented Duriel
- Diablo IV: Lord of Hatred Guide | How to Beat Tormented Beast in the Ice
- Diablo IV: Lord of Hatred Guide | How to Beat Tormented Lord Zir
- Diablo IV: Lord of Hatred Guide | How to Beat Tormented Grigoire
- Diablo IV: Lord of Hatred Guide | How to Beat Tormented Varshan
- Diablo IV: Lord of Hatred Guide | Forging an Unstoppable Champion
- Diablo IV: Lord of Hatred Guide | Paladin Build: Mastering the Zealous Shredder
- Diablo IV: Lord of Hatred Guide | Paladin Build Mastering the Falling Star Arbiter
- Diablo IV: Lord of Hatred Guide | Paladin Build: Mastering the Holy Purifier
- Diablo IV: Lord of Hatred Guide | Warlock Build Mastering the Umbral Chains Weaver
- Diablo IV: Lord of Hatred Guide | The Ultimate Endgame Build
- Diablo IV: Lord of Hatred Guide | Essential Tips and Tricks for Traversing Sanctuary
- Diablo 4 Guide | Warlock Build Mastering the Blood Pact Invoker
- Diablo 4 Guide | Mastering the Pinnacle Challenges of Sanctuary
- Diablo IV: Lord of Hatred Warlock Build Guide | Mastering the Shadow Summoner
- Diablo IV: Lord of Hatred Guide | How to Choose Your Ideal Class
- Diablo IV: Lord of Hatred Guide | Warlock Build Mastering the Brimstone Apocalypse
- Diablo IV: Lord of Hatred Guide | Mastering the Frost Juggernaut
Editor, NoobFeed
Latest Articles
No Data.