
Diablo IV: Lord of Hatred Guide | How to Beat Enkindled Judicator Boss
Here's a guide on how to beat enkindled judicator boss
Game Guide by Mash Rahman on May 29, 2026
The frozen, barren wastes of the Fractured Peaks are usually noted for their frigid temperatures and roaming undead, but the ever-changing story of the Vessel of Hatred expansion brings a very different elemental threat to the area. Players soon find themselves in the midst of the main plotline, looking for their old allies, and are quickly introduced to the violent fanaticism of the Burned Knights.
This fanatical military order, answering directly to the ruthless commander Urivar, wants to impose their own twisted brand of justice on Sanctuary. This dangerous quest will eventually lead you to a mandatory, high-stakes fight against a massive armored warrior called the Enkindled Judicator.
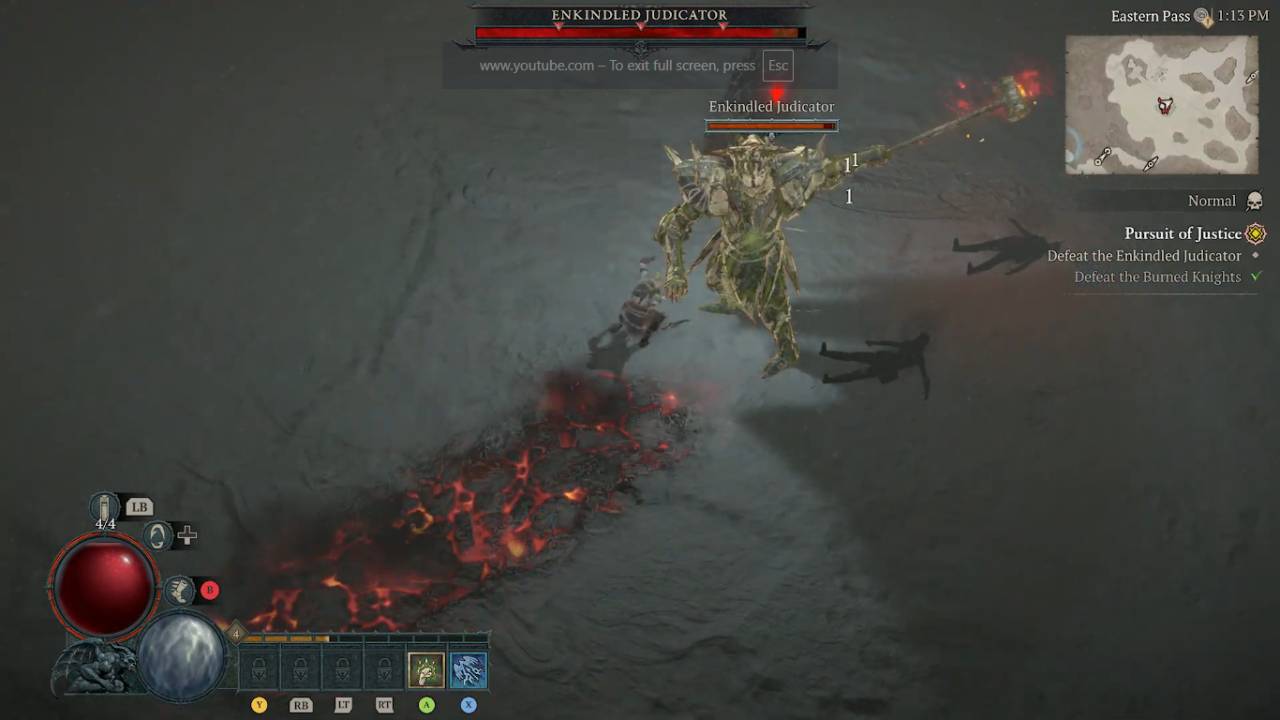
The Enkindled Judicator is the introductory boss of the expansion campaign, and also serves as a physical gatekeeper to the new story arc. This towering enemy is encountered during the main story quest called Pursuit of Justice.
Your character will have to travel to the isolated Windswept Cabin in the snowy wilderness southwest of Kyovashad to look for Lorath. But instead of a warm hearth and a familiar face, you are met by a burning barricade and heavily armed zealots hellbent on ending your journey before it even begins.
The Enkindled Judicator is not an optional side activity, but a strict requirement to progress the storyline and unlock the next chapters of the DLC. He serves as a sort of early mechanical check to players who return, but his huge size and heavy use of overlapping fire magic can punish players who dive in. The encounter is carefully crafted to re-teach you the basics of spatial awareness, telegraph recognition, and stamina management in a small outdoor arena.
Securing the windswept cabin’s perimeter
The tension of the encounter starts building the second you get near the snow-covered perimeter of the Windswept Cabin. Before the main boss reveals himself, you have to fight a small patrol of standard Burned Knights guarding outside the property. You have to talk to the commanding captain of this patrol, and it quickly degenerates into unavoidable violence. This first skirmish against the heavily armored foot soldiers is a short warm-up where you can build up your main resources and test out your area of effect damage.
You manage to send the first squad of zealots packing, and try to force your way into the cabin proper. Then the real danger arrives in style. A hulking, terrifying figure clad in thick, unnatural heat-radiating metal armor steps onto the snowy battlefield: the Enkindled Judicator. In his left hand, he wields a war hammer that is absolutely massive. This sets the stage for a physically punishing fight that heavily favors brute force over magical finesse.
The stark thematic divide between the frigid blizzards of the Fractured Peaks and the flaming inferno of his armor makes for a visually stunning backdrop for the battle. But you cannot let the cinematic presentation obscure the deadly reality of his heavy strikes. The snowy clearing outside the cabin is your arena; it lets you have a fair bit of maneuverability, but those natural environmental boundaries will quickly punish players who back themselves into a corner.
Prioritize Your Elemental Defensive Layers
Even as an introductory campaign boss, the Enkindled Judicator smacks with a fair amount of pure physical and elemental force. His whole combat identity is based on adding devastating fire magic to his heavy hammer blows. Often, players are just beginning their expansion journey when they face him, and may be wearing gear that is no longer up to date or leveling gear that is severely lacking in proper defensive optimization. If you go into this fight with badly negative or uncapped fire resistances, your health pool will melt away in an instant.
One of the best strategies is to take some time and really audit your character’s defensive stats before heading towards the cabin. Your main goal should be to bring your fire resistance as close as possible to the baseline cap of 70%. You can easily do it by socketing rubies into your jewelry pieces or by visiting the local Alchemist in Kyovashad to brew a standard Elixir of Fire Resistance. This simple consumable buffer greatly reduces the lethal burst damage of his magical shockwaves.
In addition to simply elemental tuning, upgrading your boots to grant multiple evade charges or increased movement speed is incredibly helpful for this specific encounter. The Judicator’s massive attacks are pretty telegraphed, but the sheer physical size of his weapon means the area of impact is remarkably wide. You can chain dash after dash, safely navigating through the danger zones without having to depend on your class’s unique mobility cooldowns.
.jpg)
The Hammer Smash that Shakes the Earth
The Judicator's arsenal has a physical basis in using his incredible bulk to deliver localized, earth-shattering blows. His most common area-denial attack is the Hammer Smash, and the mechanic requires strict spatial respect. The boss pauses, raising his massive weapon into the air, causing the hammerhead to glow with blinding, superheated energy. Then he drives the weapon straight down into the frozen dirt with terrifying velocity.
The first hammer blow does a lot of physical damage, but the real danger is the elemental backlash. The moment the weapon touches the ground, three distinct expanding pulses of pure fire magic ripple out from his position. These rings of flame are fast and can easily get through your basic armor if you happen to be standing near the epicenter of the explosion.
The key to avoiding this tragic chain of events is to read the bright visual telegraphs that illuminate the snow just before the hammer drops. The second you see the red warning indicator swelling over the ground, you need to stop your offensive rotations immediately and move far outside the danger zone. The pulses of fire travel outwards, so trying to dodge inwards towards the boss is suicide; you need to put actual distance between you and the boss so the waves die out before they reach your character.
Dodge the Lingering Ground Flame Shockwave
The Enkindled Judicator has a very effective forward-traveling magic attack to stop players from kiting him from max range. Sometimes the boss will stoop and slam his heavy hammer viciously across the frozen earth. This violent movement produces a directed, linear shockwave of blazing fire, known as the Ground Flame. This flaming projectile flies quickly in a straight line straight at the current position of your character, and burns the snow on the way.
Unlike the expanding circular rings of the Hammer Smash, the Ground Flame is a narrow, highly directed attack that aims to catch you mid-stride. If you attempt to outrun the projectile by simply running backward, the shockwave will easily catch up to your heels, dealing a lot of burst damage and possibly staggering your movement. If he's dragging his hammer and you are stationary to cast a channeled spell, it's equally bad, as the fire will hit you right in the chest.
This linear attack demands a disciplined, lateral evasion strategy to survive. As soon as you see him start the dragging animation and the fire start to gather at the base of his weapon, you need to immediately dash sharply to your left or right. If you step fully out of the projectile's forward path, the flame shockwave will go harmlessly past your character, giving you plenty of time to safely attack his exposed flank while he recovers from the heavy swing.
Survive the Brutal Three-Hit Combo
The Judicator’s most physically demanding and aggressive mechanic is his punishing Three Hit Combo. Instead of using stationary area-of-effect spells, the boss will suddenly lock onto your location and begin to aggressively march forward. As he pushes forward, he fires off a rapid chain of three huge sweeping horizontal blows with his blazing hammer. This combo covers a crazy amount of ground, making it very hard to outrun without dedicated mobility skills.
This combo does a bit more damage with each successive swing, and to get hit by all 3 of them in succession is almost guaranteed to trigger a fatal screen. Given the momentum of his forward movement, ducking backward is very ineffective, as his long strides will keep you easily within the range of his next swings. If you panic and spam your evade button in a straight line, you are guaranteed to be crushed by the final, heaviest blow.
The best defense against this aggressive chase is calm timing and tight directional control. Don’t run away, but pace your evasive maneuvers carefully to match the rhythm of his swings. Zigzag around his character model, dropping behind his massive shoulders as the hammer swings over the spot you just vacated. Do this circular, tight evasion pattern three times in a row, and you'll make it through the entire combo safely, leaving him facing the wrong way and open to a heavy counterattack.
Dealing with the Fanatical Reinforcements
You’ll notice that as you slowly chip away at the Judicator’s health, he won’t be alone on the battlefield for long. From time to time, the boss will summon more Burned Knights to swarm the snowy clearing in order to make your positioning more difficult and distract your focus. These common zealot minions will charge into the arena from the perimeter, actively trying to body-block your escape routes and interrupt your carefully laid evasion patterns.
These reinforcements are not individually quite as lethal as the main boss, but they serve a very particular and dangerous tactical purpose. If you let their numbers build up unchecked, you'll soon find yourself physically boxed in, utterly unable to make the lateral dodges needed to get away from the Ground Flame or the Three-Hit Combo. You must turn away from the Judicator, if only for a moment, to face the rising tide of the fanatical horde.
The best way to clear the arena of these lesser threats is to employ swift, broad-area-of-effect abilities. They often bunch up as they pursue you, so a heavy crowd-control trap or a dense burst of damage can instantly melt the entire squad. Also, the only surefire method to get health potion drops from these summoned knights is to actively kill the knights, which can be a lifesaver if you’ve taken too much incidental fire damage.
Taking the win and finding the truth
In the end, the showdown requires nothing more than mechanical consistency and sustained focus. The Judicator’s health is dropping, and while he doesn’t add any brand new mechanics, he does begin chaining his hammer smashes, flame shockwaves, and minion summons much more rapidly. Keep your disciplined side-to-side movement, respect the telegraphed danger zones on the snow, and carefully weave your damage output in between his heavy recovery windows.
.jpg)
With patience and precise footwork, you will drop your massive hammer and collapse into the frozen dirt, the towering zealot falling to his wounds. Killing the Enkindled Judicator rewards you with a nice shower of gold, experience, and the first pieces of expansion-grade loot to make your character feel more powerful. Most importantly, his death means the blockade is over, and you can now go to the Windswept Cabin without any trouble.
Once within the cabin, the true stakes of your journey become quickly obvious. You will meet Nawal, also hunting desperately for the elusive Lorath. She has a heavy message about what will happen to Neyrelle, but her words are cut off when Reverend Mother Prava arrives unexpectedly. This is where the complicated political and religious tensions of the expansion really hit home, taking you beyond your victory over the Judicator and into the dark, unfolding mysteries of the Vessel of Hatred plotline.
Also, check out our Diablo IV Review, Diablo 4: Vessel of Hatred DLC Review, and other guides below:
- Diablo IV: Lord of Hatred Guide | How to beat Dread Captain Boss
- Diablo IV: Lord of Hatred Guide | How to Beat Eidolon of Jualin Boss
- Diablo IV: Lord of Hatred Guide | How to Beat Priestess of Hatred Boss
- Diablo IV: Lord of Hatred Guide | How to Get Doom Transmogs
- Diablo IV: Lord of Hatred Guide | How to Unlock Nahantu Tiger Mount
- Diablo IV: Lord of Hatred Guide | How to Get all the Cat mounts and Armors
- Diablo IV: Lord of Hatred Guide | Understanding Gear and Items
- Diablo IV: Mythic Gear Guide | How to Farm Mythic Items
- Diablo IV: Lord of Hatred Guide | How to Beat Uber Lilith
- Diablo IV: Lord of Hatred Guide | How to Beat Tormented Andariel
- Diablo IV: Lord of Hatred Guide | How to Beat Tormented Duriel
- Diablo IV: Lord of Hatred Guide | How to Beat Tormented Beast in the Ice
- Diablo IV: Lord of Hatred Guide | How to Beat Tormented Lord Zir
- Diablo IV: Lord of Hatred Guide | How to Beat Tormented Grigoire
- Diablo IV: Lord of Hatred Guide | How to Beat Tormented Varshan
- Diablo IV: Lord of Hatred Guide | Forging an Unstoppable Champion
- Diablo IV: Lord of Hatred Guide | Paladin Build: Mastering the Zealous Shredder
- Diablo IV: Lord of Hatred Guide | Paladin Build Mastering the Falling Star Arbiter
- Diablo IV: Lord of Hatred Guide | Paladin Build: Mastering the Holy Purifier
- Diablo IV: Lord of Hatred Guide | Warlock Build Mastering the Umbral Chains Weaver
- Diablo IV: Lord of Hatred Guide | The Ultimate Endgame Build
- Diablo IV: Lord of Hatred Guide | Essential Tips and Tricks for Traversing Sanctuary
- Diablo 4 Guide | Warlock Build Mastering the Blood Pact Invoker
- Diablo 4 Guide | Mastering the Pinnacle Challenges of Sanctuary
- Diablo IV: Lord of Hatred Warlock Build Guide | Mastering the Shadow Summoner
- Diablo IV: Lord of Hatred Guide | How to Choose Your Ideal Class
- Diablo IV: Lord of Hatred Guide | Warlock Build Mastering the Brimstone Apocalypse
- Diablo IV: Lord of Hatred Guide | Mastering the Frost Juggernaut
Editor, NoobFeed
Latest Articles
No Data.