
Diablo IV: Lord of Hatred Guide | How to Beat Harbinger of Hatred Boss
Here's a guide on how to beat the harbinger of hatred in Diablo IV Lord of Hatred
Game Guide by Mash Rahman on May 30, 2026
The jungle of Nahantu is thick and oppressive, hiding many ancient secrets. None is more instantly deadly than the Harbinger of Hatred. This example of Mephisto’s direct malice is one of the most mechanically intensive boss fights in all of Diablo IV.
Defeating this monstrous threat is not simply a matter of forcing your way through it with high damage numbers. You need precision, spatial awareness, and a deep respect for multi-phased arena mechanics that can end an uncoordinated run in an instant.
.jpg)
Adventurers seeking to test themselves against this dark entity will have to travel to the Harbinger's Den, situated near the Kurast Docks Waypoint. Whether this nightmare is happening during the campaign itself, or you’re facing the ramped-up endgame version via specialized sigils, preparation is your absolute lifeline. The arena is a small circular platform where defensive positioning and mechanical execution are the absolute priority over mindless offensive aggression.
Getting to the Lair of the Beast
Before you can step foot in the arena to confront this terrifying wolf demon, you need to know how to unlock the encounter. In the main expansion storyline, the confrontation serves as a natural narrative climax during the crucial quest All Good Things. But the story is over, and now the real challenge begins, as the boss scales massively into the brutal Torment difficulty tiers.
To get to the treasure horde and fight the standard boss endgame, you first have to track down specific targets out in the open world. First, you have to kill the corrupt commander Urivar to open the reward cache inside the lair. He drops the Abhorrent Hearts required for this. With multiple hearts, you can re-run the encounter over and over again to farm high-end uniques and good crafting materials.
The Echo version of the fight takes it up a notch if you’re looking for the ultimate challenge. If you are up for the challenge of this ultra-powerful form, you will have to go to the Alchemist and make a special item called the Echo Sigil of Hatred. To create this sigil, you will need rare seasonal materials, Abyssal Cores, and Essences of Despair, which are available from high-level dungeons and public events.
Get Your Defenses and Resistance Gear Ready
You have to willfully audit your character's defensive stats before you even walk through the door into the arena. Harbinger of Hatred is a build that depends heavily on devastating Shadow and Poison elemental damage types to wear down aggressive players. You ignore your resistance caps at your own peril before this fight, as even simple environmental hazards will tear through your health pool with ease.
A trip to the local Alchemist in town to craft a high-tier Elixir of Shadow Resistance or Poison Resistance provides a huge protective cushion. And make sure your healing potions are also upgraded to your current level tier so your recovery will scale well enough with the incoming damage. Damage resistance when injured or when affected by a barrier is what gives you the split-second buffer to survive sudden mechanical overlaps, so try to equip armor pieces that provide this.
You can turn the whole encounter around by using powerful defensive aspects on your gear. For less tanky characters, things that give small windows of invulnerability when taking large damage, like the Protecting Aspect or the Prudent Heart, are highly recommended. These tools are a vital safety net for when you inevitably make a spatial mistake during the more chaotic portions of the fight.
The Opening Stage and the Tumult of Projectiles
The Harbinger begins the fight by rushing out of the shadows, requiring players to quickly find a defensive rhythm. At the very beginning, a shrinking circle appears around the edges of the battlefield, greatly reducing the area in which you can operate. If you are outside of this boundary, your health will drain rapidly, so you need to stay tightly centered in the boss' immediate striking range.
At the start of this stage, the boss will start throwing out cascading projectiles that bounce and explode in wide arcs across the floor. These missiles are dark red and grey and fly in a standard multi-shot spread that can easily overwhelm a player standing still. Fighting these baseline attacks head-on will burn through your potion supply before the real mechanics even get underway.
You need to not run in straight lines to avoid these early projectiles, which makes you very easy to predict. Instead, practice dodging diagonally, and kiting the boss in tight, purposeful circles around the safe zones of the arena. This strategy of staying at a distance helps you to keep a consistent amount of damage up while your exploding projectiles fizzle out safely behind you.
Mephisto's Corruption & Portal Lunges Survival
As the fight progresses, the Harbinger will begin to use environmental AoE attacks to limit your safe spaces. The most common of these is Mephisto's Corruption, denoted by three large circles that appear quickly under your character. After a short delay, these areas explode, dealing heavy damage and leaving lasting void pools on the ground that poison anyone who steps inside.
The boss will also periodically disappear entirely into localized portals, then lunge horizontally across the room. This lunge attack is super fast and has no clear visual tell, so you need to be constantly mobile to avoid being run over. When you see the boss prepare a Corrupted Barrage, which is indicated by a distinct fire gathering in his mouth, sprint to his flank or behind his back immediately to evade the frontal blast.
Long-term survival depends on managing your active evade charges during these shifting attacks. When he lunges, you can gain a bit of tactical advantage by shoving your character all the way to the bottom middle of the circular arena. This particular placement allows the boss’s outward projectiles to have more physical distance to spread apart, leaving much larger gaps for your character to safely slide through.
Core Orb and Gateway Mechanics Mastery
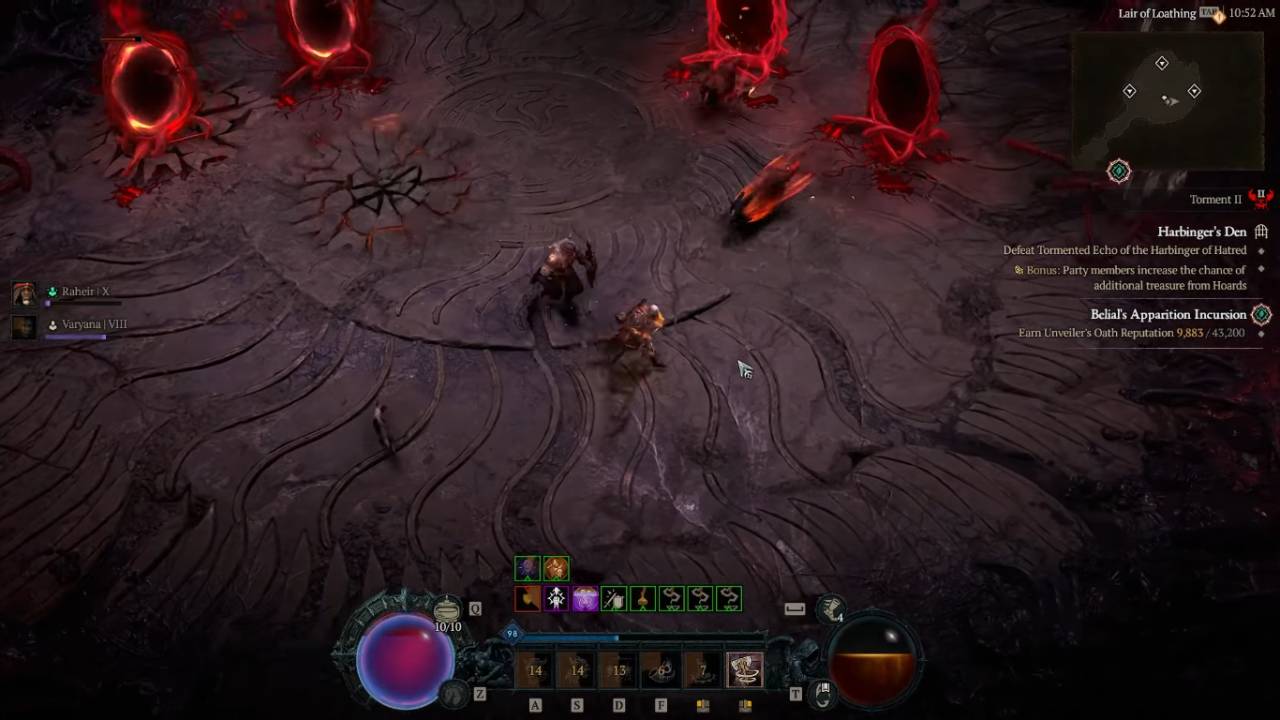
The fight's structural complexity changes when the Harbinger retreats and opens dark gateways around the perimeter. These portals will have special demonic kin that run straight across the stage and will instantly kill you if they touch your character. Standard attacks on these portals can be very slow and dangerous to many character builds, and are more prone to brute force.
.jpg)
To get rid of this phase safely, you have to actively hunt down the glowing yellow orbs of light left by the spirit of Akarat. Picking up one of these special orbs will automatically replace your primary actions with a dedicated projectile throw. You have to quickly aim and shoot these orbs of light right at the active gateways to bring them down before the kamikaze minions swarm the stage.
Focus. Snatching up an orb locks you out of your normal movement skills and normal rotations for a while, making you susceptible to surprise lunges. If you time your shots correctly as the boss exits a portal, a single well-placed light orb can go through multiple targets. This efficient angle can knock out a minor gateway and do a massive chunk of stagger damage to the boss at the same time.
Learn Build Interactions & Limits
While the orb mechanic is the intended design for handling the gateways, it creates serious complications for some character classes. For example, a Druid with a Pulverize build will notice that picking up an orb will immediately kick them out of Grizzly Rage and begin the full cooldown. This punishing interaction can totally kill your offensive momentum and leave you vulnerable for a time.
Minion-based classes such as Necromancers often fare poorly during this phase for the same reason, owing to the nature of their AI forces. Skeletons and golems will often waste their damage attacking invulnerable portals or drifting targets, instead of focusing on pressing immediate threats. If your particular build has these mechanical limitations, you can simply decide to ignore the orbs altogether.
Characters with high AoE damage, like Rogues or Sorcerers with Hydra builds, can often destroy the gateways simply with their raw skill power. You can put high damage constructs right next to the portal spawn points and melt them down without losing mobility. This alternative approach preserves your core rotation assuming that your character has the raw offensive stats to beat the spawning timer.
Releasing Akarat and Weathering Phase II
After successfully collapsing the first set of gateways, the Harbinger will reappear for the second major phase of the encounter. At this point, a major secondary objective is introduced, as the corruption imprisons the benevolent spirit of Akarat within a central Hatred Prison. During the time this jail is active, the boss gets massive defensive buffs, making your normal attacks almost useless.
You have to immediately turn your most damaging skills to the central cage to smash the prison and free the trapped lion. This is often a frustrating part for players with companion-heavy builds, as companion AI tends to struggle to prioritize the prison over the boss. You can also use target-forcing command skills or physically drag your character to the bottom of the screen to forcefully redirect your forces toward the cage.
Once Akarat is freed, the portal clearing process is repeated, where you have to grab more yellow orbs while avoiding a denser population of spawning gateways. During this transition, the arena will start spawning larger, elite versions of the Hollow monsters. Elites have large health bars and resist single element types, so you’ll want to burst them down quickly before they clutter up the battlefield.
Finishing the final stage and changing the course
The last phase of the fight sees a complete reversal of fortunes for Mephisto's harbinger. Akarat will finally come into play on the battlefield, granting the yellow light orbs a whole new offensive ability. These golden projectiles can now be weaponized to do catastrophic direct damage to the boss, rather than just using the orbs defensively to break down gateways.
During this last phase, the Harbinger will use his most powerful unique ability called Curse of Despair. This mechanic takes the form of a large dark red aura that covers a large portion of the circular arena floor. If you stand in this cursed aura, it will instantly turn your healing potions into direct self-damage and remove your active barriers.
In this last stretch, speed and environmental awareness are absolutely key as the arena becomes completely cluttered with overlapping hazards. You will have to dodge rotating fire beams, explosive red balls of death, and long rectangular poison zones that stretch across the floor all at the same time. Grab the empowered orbs as soon as you can and throw them directly at the Harbinger to break his second health bar.
Locking Down Your Loot and Picking Up the Beat
The last empowered projectile will strike, and the Harbinger of Hatred will fall back into the void, abandoning his precious hoard. Mechanical discipline brings immediate rewards in the form of large amounts of gold, dense Paragon experience points, and rare crafting materials. More importantly, this particular boss is a great source for target-farming class-specific uniques and ultra-rare Mythic Unique gear pieces.
Don’t get frustrated if you find yourself wiping over and over again during the last stages. This fight is explicitly designed to serve as a mechanical wall that punishes greedy gameplay and poor positioning. Take a moment to step away, adjust the movement speed attributes on your boots, and make sure your resistances are fully optimized.
Think of the fight as a rhythmic dance instead of a standard DPS check, and you will instinctively learn the visual tells for all the major attacks. Remember, the only true victory is survival, so always opt to dodge a hazard rather than try to squeeze in an extra attack string. With patience and practice, you will learn the arena layout, silence Mephisto's avatar, and cement your status as a true champion of Nahantu.
Also, check out our Diablo IV Review, Diablo 4: Vessel of Hatred DLC Review, and other guides below:
- Diablo IV:Lord of Hatred Guide | How to Get All the Horse Mounts
- Diablo IV: Lord of Hatred Guide | How to Beat Ah Bulan Boss
- Diablo IV: Lord of Hatred Guide | How to Beat Urivar Boss
- Diablo IV: Lord of Hatred Guide | How to Beat Vesicator Boss
- Diablo IV: Lord of Hatred Guide | How to Beat Abhorrent Manifestation Boss
- Diablo IV: Lord of Hatred Guide | How to Beat Enkindled Judicator Boss
- Diablo IV: Lord of Hatred Guide | How to beat Dread Captain Boss
- Diablo IV: Lord of Hatred Guide | How to Beat Eidolon of Jualin Boss
- Diablo IV: Lord of Hatred Guide | How to Beat Priestess of Hatred Boss
- Diablo IV: Lord of Hatred Guide | How to Get Doom Transmogs
- Diablo IV: Lord of Hatred Guide | How to Unlock Nahantu Tiger Mount
- Diablo IV: Lord of Hatred Guide | How to Get all the Cat mounts and Armors
- Diablo IV: Lord of Hatred Guide | Understanding Gear and Items
- Diablo IV: Mythic Gear Guide | How to Farm Mythic Items
- Diablo IV: Lord of Hatred Guide | How to Beat Uber Lilith
- Diablo IV: Lord of Hatred Guide | How to Beat Tormented Andariel
- Diablo IV: Lord of Hatred Guide | How to Beat Tormented Duriel
- Diablo IV: Lord of Hatred Guide | How to Beat Tormented Beast in the Ice
- Diablo IV: Lord of Hatred Guide | How to Beat Tormented Lord Zir
- Diablo IV: Lord of Hatred Guide | How to Beat Tormented Grigoire
- Diablo IV: Lord of Hatred Guide | How to Beat Tormented Varshan
- Diablo IV: Lord of Hatred Guide | Forging an Unstoppable Champion
- Diablo IV: Lord of Hatred Guide | Paladin Build: Mastering the Zealous Shredder
- Diablo IV: Lord of Hatred Guide | Paladin Build Mastering the Falling Star Arbiter
- Diablo IV: Lord of Hatred Guide | Paladin Build: Mastering the Holy Purifier
- Diablo IV: Lord of Hatred Guide | Warlock Build Mastering the Umbral Chains Weaver
- Diablo IV: Lord of Hatred Guide | The Ultimate Endgame Build
- Diablo IV: Lord of Hatred Guide | Essential Tips and Tricks for Traversing Sanctuary
- Diablo 4 Guide | Warlock Build Mastering the Blood Pact Invoker
- Diablo 4 Guide | Mastering the Pinnacle Challenges of Sanctuary
- Diablo IV: Lord of Hatred Warlock Build Guide | Mastering the Shadow Summoner
- Diablo IV: Lord of Hatred Guide | How to Choose Your Ideal Class
- Diablo IV: Lord of Hatred Guide | Warlock Build Mastering the Brimstone Apocalypse
- Diablo IV: Lord of Hatred Guide | Mastering the Frost Juggernaut
Editor, NoobFeed
Latest Articles
No Data.